Acrylic, known for its crystal-clear appearance and impressive durability, is a popular material in both professional and DIY settings. Used in signage, aquariums, greenhouses, furniture, and a wide range of crafts, acrylic sheets offer a versatile alternative to glass. Yet, working with acrylic, especially drilling through it, can intimidate even seasoned makers. Fear of cracks, chips, and ruined materials is widespread, and for good reason: improper drilling can quickly destroy an otherwise flawless piece.
But is drilling through acrylic truly as difficult as it seems? With the right techniques, tools, and preparation, anyone can achieve clean, precise holes in acrylic, whether for mounting hardware, wiring, or custom design work. This article explores everything you need to know about drilling through acrylic, backed by expert advice, practical tips, and real-world examples.
By the end, you’ll have the confidence to tackle your next acrylic project with professional results.
Key Takeaways
- Acrylic sheets can be successfully drilled with proper preparation, the right tools, and careful technique.
- The most common causes of cracks and chips are excessive speed, improper drill bits, and lack of support.
- Specialized drill bits and cooling techniques greatly reduce the risk of damage.
- Real-world examples and data-driven comparisons show that careful planning yields consistent, high-quality results.
- Safety precautions and post-drilling finishing steps are essential for both appearance and long-term durability.
- Beginners and professionals alike can benefit from following structured, step-by-step guidelines.

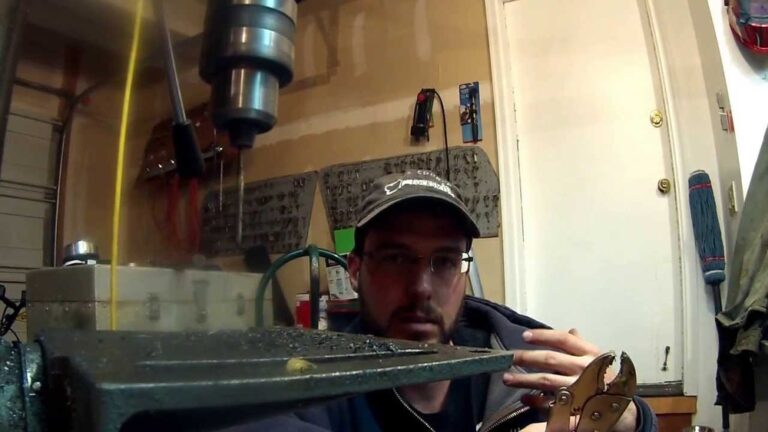
Credit: www.youtube.com
Understanding Acrylic As A Material
Acrylic, often sold under brand names like Plexiglas and Perspex, is a type of thermoplastic known for its optical clarity and shatter resistance. Understanding its properties is crucial before attempting to drill through it.
Physical Properties Of Acrylic
Acrylic is lightweight, about half the weight of glass, but offers up to 17 times greater impact resistance. It is also more flexible, allowing for a small degree of bending without breaking. However, its surface is softer than glass and prone to scratching.
The material comes in various thicknesses, typically ranging from 1/16 inch to over 1 inch.
Brittleness And Sensitivity To Heat
Despite its resilience, acrylic remains brittle compared to polycarbonate plastics. The main risk when drilling is stress fracturing: a phenomenon where cracks radiate outward from the drilled hole. This typically occurs due to high friction, excessive pressure, or thermal buildup. Unlike metals, acrylic cannot dissipate heat quickly, making it susceptible to melting or deformation at the drill point.
Common Uses And Drilling Scenarios
Drilling is required in various acrylic applications, including:
- Mounting panels for display cases
- Installing hinges or hardware on doors and windows
- Creating custom aquariums or terrariums
- Routing holes for LEDs and wiring in signs
Each scenario may require different hole sizes, depths, and finish quality, but the underlying drilling principles remain the same.
How Acrylic Compares To Other Materials
| Property | Acrylic | Polycarbonate | Glass |
|---|---|---|---|
| Impact Resistance | High | Very High | Low |
| Brittleness | Medium | Low | High |
| Thermal Sensitivity | High | Medium | Low |
| Clarity | Very High | High | Very High |
| Ease of Drilling | Medium (with care) | Easy | Difficult |
Understanding these material differences helps in tool selection and setting realistic expectations for drilling outcomes.
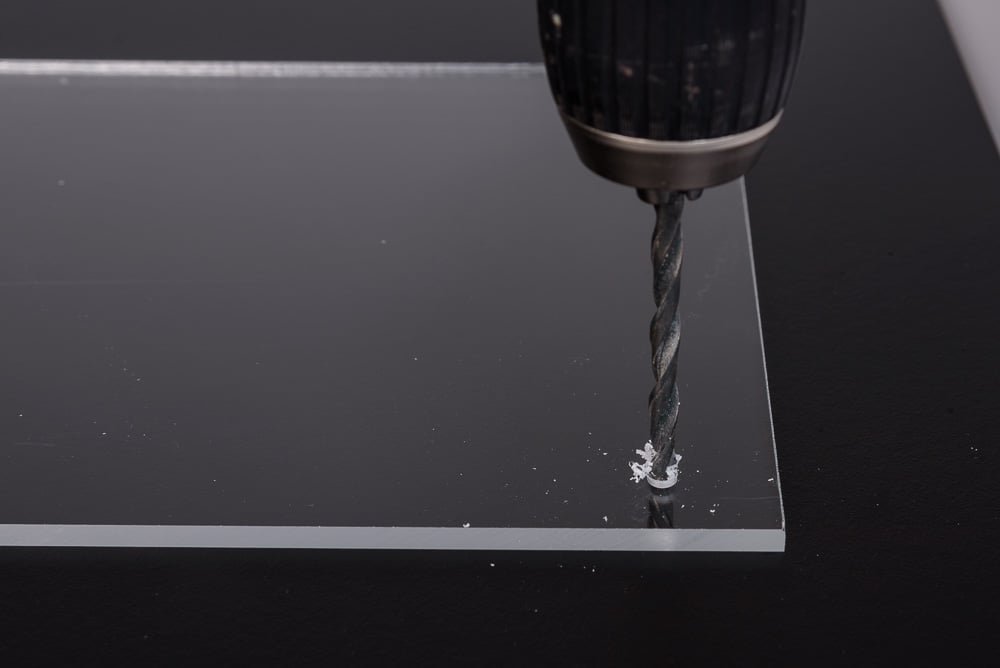
Credit: plasticsheetsshop.co.uk
Preparing To Drill Through Acrylic
Proper preparation is the foundation for clean, chip-free holes in acrylic. Skipping or rushing these steps is the fastest way to ruin your material.
Selecting The Right Tools
The choice of drill and bit determines much of your success. For most acrylic drilling tasks, a standard corded or cordless drill is sufficient. However, the drill bit matters most:
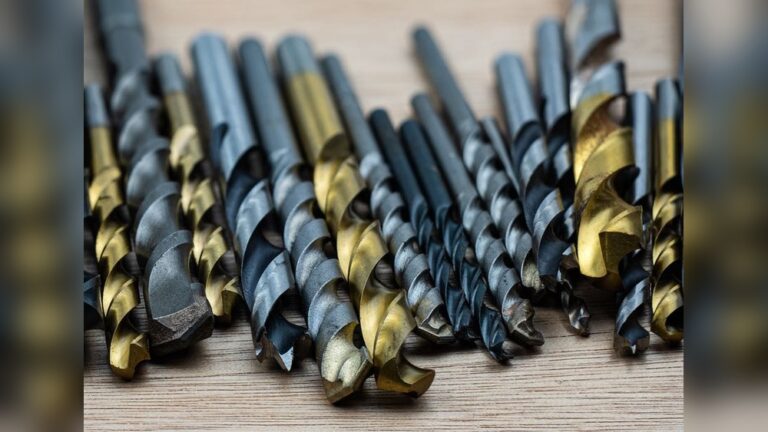
- Acrylic drill bits: These have a special tip angle (60, 90°) and a sharper cutting edge to minimize chipping.
- Brad point bits: Also known as spur bits, these are designed for wood but work well with acrylic when used gently.
- Twist bits: Standard metal bits can be used in a pinch but may cause more chipping unless modified.
Warning: Never use masonry bits or spade bits, as they are too aggressive for acrylic.
Preparing The Acrylic Sheet
Start by marking the drill points with a non-permanent marker or a piece of masking tape. Taping also helps prevent the bit from wandering and reduces surface chipping. Place the acrylic on a flat, stable surface, ideally with a sacrificial backing board (such as MDF or plywood) underneath. This prevents blowout on the exit side.
Safety Precautions
Personal safety should never be overlooked:
- Wear safety glasses to protect against flying chips.
- Use gloves to avoid cuts from sharp edges.
- Secure the sheet with clamps to prevent movement.
Pro Tip: Work in a well-ventilated area, as acrylic dust can be irritating.
Case Study: Preparation Failure Vs. Success
In my experience, a poorly clamped sheet led to a spiderweb crack during a sign-making project, costing both time and material. On a subsequent attempt, using proper taping, backing, and clamping, the result was a perfectly smooth hole, demonstrating the value of careful preparation.
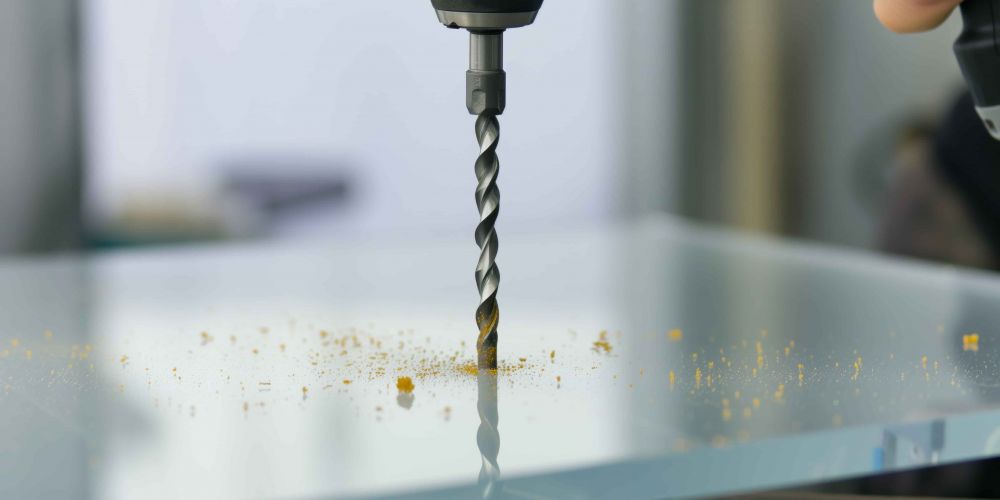
Credit: www.cutmy.co.uk
Step-by-step Guide: Drilling Through Acrylic
Achieving clean results requires a deliberate, stepwise approach. Rushing or skipping steps increases the risk of costly mistakes.
Marking And Securing The Workpiece
- Mark the drill location with a sharp pencil or tape.
- Apply a strip of masking tape to both sides of the acrylic at the drill point.
- Place the acrylic on a scrap board and secure it with clamps. Ensure there is no movement.
Choosing And Setting Up The Drill Bit
- Insert the chosen acrylic or brad point bit into the drill.
- Set the drill to its lowest speed (typically 500, 1000 RPM for hand drills).
- If using a drill press, set the quill stop to avoid over-penetration.
Drilling Technique
- Hold the drill perpendicular to the surface.
- Apply gentle, even pressure. Let the bit do the cutting, do not force it.
- Drill partway through, then back out to clear chips.
- For thicker sheets, repeat this process in increments, allowing the material to cool.
Cooling And Lubrication
Acrylic generates heat during drilling. To prevent melting or warping:
- Pause periodically to allow cooling.
- Use a small amount of water or soapy solution as a lubricant.
- For large holes, consider drilling a small pilot hole first.
Example: When creating mounting holes for a custom aquarium, I found that periodically dipping the bit in water kept the acrylic cool and resulted in flawless holes.
Removing The Bit And Inspecting The Hole
- Slow the drill as you near the exit point to avoid blowout.
- Once through, gently reverse the drill to withdraw the bit.
- Remove the tape and inspect for cracks or chips.
If any rough edges remain, proceed to finishing steps.
Drill Bits And Tools: What Works Best For Acrylic?
The right drill bit makes a dramatic difference in outcome. Using the wrong bit often leads to cracks, chips, or excessive melting.
Types Of Drill Bits For Acrylic
| Drill Bit Type | Recommended For | Pros | Cons |
|---|---|---|---|
| Acrylic/Plexiglas Bit | All acrylic thicknesses | Clean cuts, minimal chipping | More expensive, less common in hardware stores |
| Brad Point Bit | Thin to medium sheets | Accurate, less wandering | Can still chip if rushed |
| Twist Bit (metal) | Quick jobs, small holes | Widely available | Higher chip risk, needs careful use |
| Step Bit | Large holes, thin sheets | Reduces cracking, great for enlarging holes | Not for thick acrylic |
Tool Comparison: Hand Drill Vs. Drill Press
- Hand drill: More accessible, portable, and sufficient for most home projects. Requires a steady hand.
- Drill press: Offers the most precise control, especially for repetitive tasks or thick materials. Useful for professionals or large-scale fabrication.
Example: A small sign shop used a drill press with a custom jig to produce consistent holes in hundreds of acrylic panels for a museum exhibit.
Modifying Standard Bits
For those without access to specialty bits, standard twist bits can be adapted:
- Sharpen the tip to a 60, 90° angle.
- Reduce the rake angle with a fine file.
While not as effective as purpose-made acrylic bits, this modification greatly lowers the risk of chipping.
Tool Maintenance
Sharpness is crucial; dull bits generate excess heat and cause stress fractures. Always inspect and replace bits as needed.
Avoiding Common Problems: Cracks, Melting, And Chips
Even with proper tools, mistakes can happen. Understanding the most frequent issues, and their solutions, can save both material and frustration.
Cracking: Causes And Prevention
Cracks often originate from:
- Using too much force
- High drill speeds
- Lack of support beneath the hole
Prevention tips:
- Always back the acrylic with a scrap board.
- Drill slowly, pausing to let the material cool.
- Use tape and marked guides.
Melting And Deformation
Excessive heat causes acrylic to melt, sticking to the bit and deforming the hole. To prevent this:
- Use lower speeds (500, 1000 RPM).
- Apply a cooling spray or water.
- Remove chips frequently to avoid clogging.
Example: During a lighting installation, switching from high-speed to low-speed drilling eliminated a recurring melting issue.
Chipping And Rough Edges
Chipping is most common at the hole exit. To minimize this:
- Clamp the sheet tightly.
- Reduce pressure as the bit breaks through.
- Use tape on both sides for support.
If minor chips occur, they can often be sanded out (see the next section).
Pro Tip: Test On Scrap First
Before drilling your final piece, always practice on a scrap section of the same acrylic. This allows you to fine-tune speed, pressure, and bit choice.
Finishing And Cleaning Drilled Holes
After drilling, attention to detail in finishing ensures both safety and aesthetics.
Removing Burrs And Smoothing Edges
Small burrs or rough spots can be removed with:
- Fine-grit sandpaper (320, 600 grit)
- A deburring tool
- A small file
Sand in a gentle, circular motion to avoid gouging the surface.
Polishing For Optical Clarity
For applications requiring transparency (e.g., aquariums, display cases):
- Progressively sand the hole edge with higher grit (up to 1200).
- Apply a plastic polish with a soft cloth.
- Buff with a microfiber towel for a glass-like finish.
Cleaning Acrylic After Drilling
Acrylic attracts dust and static. To clean:
- Rinse with lukewarm water to remove particles.
- Use a mild soap solution if needed.
- Dry with a lint-free cloth; avoid paper towels.
Warning: Never use ammonia-based cleaners, as they can damage acrylic.
Example: Finishing For Professional Signage
A commercial sign fabricator shared that their post-drilling routine, sanding, polishing, and static removal, reduced customer complaints by 90% and improved overall product quality.
Real-world Applications And Case Studies
Drilling through acrylic is a routine task in many industries and creative projects. These examples highlight the diversity of successful approaches.
Aquarium Building
Custom aquarium builders often use 1/2-inch or thicker acrylic. Due to the material’s expense, mistakes are costly. Builders rely on slow-speed drilling, specialized bits, and water cooling. Holes for plumbing and filtration are finished with fine polishing to ensure watertight seals.
Retail Display Manufacturing
Retailers require clean, uniform holes for shelving and hardware. Larger shops use drill presses with jigs for repeatability. Smaller operations may rely on hand drills but always use tape, sacrificial backing, and moderate speeds.
Maker And Hobbyist Projects
DIY makers frequently drill acrylic for LED enclosures, robotics, or craft displays. Many report initial failures due to using standard metal bits at high speed, but after switching to acrylic bits and following best practices, their results match commercial quality.
Data Comparison: Success Rates By Method
| Method | Crack/Chip Rate | Required Equipment |
|---|---|---|
| Standard Bit, High Speed | High | Basic Drill |
| Specialty Bit, Low Speed | Low | Drill, Acrylic Bit, Clamps |
| Drill Press, Backing Board | Very Low | Drill Press, Jigs |
As shown, using the correct tools and technique dramatically improves outcomes.
Example: Artist Fabrication
A contemporary artist working with layered acrylic sculptures used a step bit and drill press for hundreds of precision holes. By pre-taping, cooling, and sanding each hole, the finished pieces exhibited both strength and clarity, with no visible cracks.
Advanced Techniques And Expert Tips
For those seeking even better results, or tackling complex projects, advanced methods can further enhance success.
Step Drilling And Progressive Sizing
Drilling a small pilot hole before enlarging to final size reduces stress. Step bits, which gradually widen the hole, are especially effective for thin sheets.
Laser Drilling
In high-tech or industrial settings, laser drilling offers the cleanest, most precise holes with no physical contact. However, this method is costly and requires specialized equipment.
For more on laser machining, see Wikipedia: Laser Drilling.
Using Coolants And Lubricants
Commercial shops often use specialized plastic-safe coolants, but water or a mild soapy solution works for most hobbyists. Always ensure no residue remains before assembly.
Repairing Minor Cracks
If a minor crack occurs near the hole, it can often be stabilized with a small drop of acrylic cement. This solvent fuses the material and prevents further spreading.
Pro Tip: Edge Support For Large Panels
When drilling near the edge of a large acrylic sheet, place a support block beneath the hole site to prevent flexing. This is essential for panels over 24 inches wide.
Example: Large-scale Architectural Installations
Architectural firms installing acrylic panels in office atriums often drill mounting holes on-site. Teams use portable drill presses, cooling sprays, and multiple clamps. Finished holes are visually indistinguishable from factory-made.
Safety, Environmental, And Maintenance Considerations
Drilling acrylic carries certain risks and responsibilities, both personal and environmental.
Personal Safety
Always wear protective eyewear and gloves. Acrylic dust, while not highly toxic, can irritate the eyes and skin. Avoid inhaling fine particles.
Fire And Heat Hazards
Acrylic is flammable. Remove all sources of open flame from the work area. In rare cases, friction heat from dull bits can ignite fine shavings.
Disposal And Recycling
Acrylic is recyclable, but not all local facilities accept it. Collect chips and offcuts for proper disposal or recycling. Never burn acrylic, as it releases hazardous fumes.
For detailed recycling information, visit Acrylic Sustainability Council.
Tool Maintenance
Clean drill bits after each use. Remove acrylic residue with a soft cloth and mild solvent. Store bits in a dry place to avoid corrosion.
Storage Of Acrylic
Keep unused acrylic sheets in a cool, dry area, away from direct sunlight. Store flat to prevent warping.
Frequently Asked Questions
Can I Use A Regular Metal Drill Bit For Acrylic?
Yes, but with caution. Standard metal bits can work if used at low speed and with gentle pressure. However, they are more likely to cause chipping and cracking compared to bits designed specifically for acrylic. Modifying the tip angle can improve results, but for best outcomes, use a specialty acrylic bit.
How Do I Prevent The Acrylic From Cracking Near The Edges?
Drilling near the edge increases the risk of cracks due to less support. To minimize this, always clamp the sheet securely, use a backing board, and drill a small pilot hole before enlarging. Supporting the sheet close to the drill site and reducing drill speed further lowers the chance of cracking.
What’s The Best Way To Drill Large Holes In Acrylic Sheets?
For holes larger than 1/2 inch, use a step bit or a hole saw with fine teeth, designed for plastics. Drill a small pilot hole first, then gradually increase to the final size. Always use tape, backing boards, and cooling to avoid melting and chipping.
For professional-quality holes, consider having them laser-cut.
Is It Safe To Use Power Tools On Acrylic Indoors?
Drilling acrylic indoors is generally safe, provided the area is well-ventilated. Acrylic dust is not highly toxic but can irritate the respiratory system. Use a dust mask, keep windows open, and clean up thoroughly after the job. Avoid using compressed air, as it can spread fine particles.
Can Drilled Holes In Acrylic Be Repaired If Chipped Or Cracked?
Minor chips can be smoothed with sandpaper or a deburring tool. Small cracks may be stopped with a drop of acrylic cement, which chemically bonds the material. For significant damage, it is often more effective to redrill the hole in a different location or replace the piece.
Drilling through acrylic is both an art and a science, but with the right preparation, tools, and technique, even beginners can achieve professional-quality results. Whether you’re building custom displays, constructing aquariums, or crafting unique art pieces, following these guidelines ensures your work is both beautiful and durable.
With careful planning and attention to detail, your next acrylic project will stand out for its clarity and precision.