Drilling into glass conjures visions of shattered shards and ruined projects, but with the right knowledge, the process is surprisingly manageable, even for beginners. Whether you want to create a custom vase, modify a glass tabletop, or add drainage to glass planters, learning how to drill a hole in glass opens a world of creative and practical possibilities.
The challenge lies in glass’s unique fragility; one wrong move, and a crack can send your hard work down the drain. Yet, with careful preparation and the right tools, precision holes can be achieved safely and cleanly.
This comprehensive guide walks you through every aspect of drilling holes in glass, blending expert advice, real-world examples, safety protocols, and advanced troubleshooting. We’ll compare the best drill bits, explore essential safety steps, and outline the process for various glass types and thicknesses.
By the end, you’ll have the confidence and actionable know-how to tackle your next glass project, without the fear of breakage.
Key Takeaways
- Use specialized diamond or carbide-tipped drill bits for best results in glass.
- Safety first: Always wear protective gear and prepare your workspace to minimize risks.
- Keeping the glass cool during drilling prevents cracks and ensures smooth holes.
- Different glass types (tempered, annealed, stained) require unique handling techniques.
- Follow a step-by-step process to avoid common mistakes and achieve professional results.
- Reference real-world examples and troubleshooting tips for advanced projects and repairs.

Credit: www.youtube.com
Understanding Glass Types And Their Drillability
Not all glass is created equal. The ability to drill a hole depends significantly on the type of glass you’re working with. Choosing the right approach for each type can mean the difference between success and disaster.
Annealed Glass
Annealed glass is the most common type found in household items, windows, and picture frames. It’s cooled slowly during manufacturing, making it less prone to sudden shattering compared to tempered glass. Annealed glass is ideal for drilling, as long as you proceed with care and use the correct bit.
Tempered Glass
Tempered glass undergoes a special heat-treatment process, making it four to five times stronger than annealed glass. However, drilling into tempered glass is generally not recommended. Once tempered, any attempt to drill or cut often results in the glass shattering completely due to the internal stresses. If you must have a hole in tempered glass, it should be drilled before the tempering process at the factory.
Laminated Glass
Laminated glass consists of two or more layers of glass bonded with a plastic interlayer. Common in car windshields and safety applications, laminated glass can be drilled, but the process is slower and requires care to avoid delaminating or cracking. Specialized bits and slower speeds are crucial.
Stained And Decorative Glass
Stained glass and other decorative varieties are often thin and may contain embedded metals or paints. These can be drilled, but extra care is needed to prevent chipping or damaging the design. A gentle touch and the use of a backing material are recommended.
Comparison Table: Glass Types And Drillability
| Glass Type | Common Uses | Drillability | Special Considerations |
|---|---|---|---|
| Annealed | Windows, frames, jars | High | Standard safety and cooling needed |
| Tempered | Shower doors, car windows | Very Low (not recommended) | Will likely shatter if drilled |
| Laminated | Windshields, skylights | Moderate | Slow speed; avoid delamination |
| Stained/Decorative | Art, lamps, panels | Moderate | Support backing, low pressure |

Credit: www.thespruce.com
Essential Tools And Materials For Drilling Glass
Equipping yourself with the correct tools is the foundation of a safe and successful glass drilling project. Using the wrong equipment increases the risk of shattering and can compromise the finished result.
Drill Types And Speed Controls
A variable-speed power drill is preferred for glass. High speeds can cause excessive friction and heat, leading to cracks. Corded drills usually offer more consistent power, but cordless models are suitable for lighter tasks. Rotary tools like Dremels can be used for small holes or delicate projects.
Drill Bits For Glass
Two main types of bits are suitable for glass:
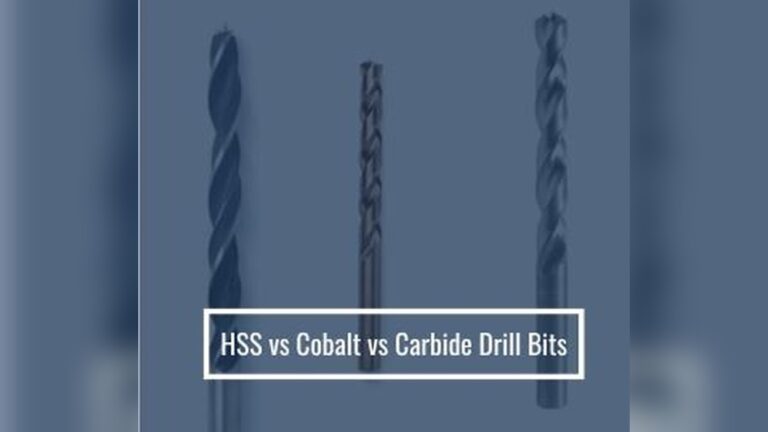
- Diamond-tipped bits: The gold standard for glass drilling, these bits grind rather than cut, minimizing stress and cracks. Available in a wide range of diameters, they’re essential for professional results.
- Carbide-tipped bits: Less expensive than diamond bits and suitable for occasional use, but wear out faster and may cause more chipping.
Drill Bit Comparison Table
| Bit Type | Durability | Hole Quality | Cost | Best Use |
|---|---|---|---|---|
| Diamond-Tipped | High | Very Smooth | Higher | Frequent, large holes |
| Carbide-Tipped | Medium | Slightly Rougher | Lower | Infrequent, small holes |
Safety Equipment
Protecting yourself is non-negotiable. Always use:
- Safety glasses or goggles to shield eyes from shards.
- Gloves for hand protection and better grip.
- Dust mask when working with glass that may produce fine particles.
- Protective clothing to prevent injury from sharp fragments.
Supporting Materials
- Masking tape: Placed on both sides of the glass, it helps prevent chipping and keeps the drill bit steady.
- Water or coolant: Critical for dissipating heat during drilling.
- Wood or rubber backing: Provides support and prevents cracking as the bit exits the glass.
- Clamp or vise: Stabilizes the glass, reducing the risk of slipping.
Credit: www.youtube.com
Preparing To Drill: Workspace, Safety, And Glass Setup
Preparation is half the battle when working with glass. A properly arranged workspace and safety precautions set the stage for a smooth drilling process.
Workspace Setup
Choose a well-lit, clutter-free area with a stable work surface. Avoid areas with foot traffic or distractions. Lay down a non-slip mat or towel to prevent the glass from moving and to cushion accidental drops.
Glass Cleaning And Marking
Before drilling, clean the glass thoroughly with glass cleaner and a lint-free cloth to remove dust and oil. This helps the masking tape stick and prevents contaminants from entering the drilled hole.
To mark the drilling spot:
- Place a small X with masking tape over the target area. This gives the drill bit extra grip and minimizes surface chipping.
- Use a marker or grease pencil to mark the precise drilling location atop the tape.
Securing The Glass
Glass must be fully supported on a soft, flat surface. For best results:
- Place the glass on a wooden or rubber backing.
- If possible, clamp the glass gently at the edges, using padding to avoid pressure points.
- Never clamp directly over the drilling area.
Pro Tip:
Always allow extra space around the drilling site for error and to avoid stress at the glass’s edges.
Step-by-step Guide To Drilling A Hole In Glass
Even with the best tools and preparation, following a methodical process is essential for success. Here’s a detailed walkthrough, broken down for clarity.
Step 1: Assemble Tools And Safety Gear
Gather all equipment and put on your safety glasses, gloves, and dust mask. Double-check that your drill bit is securely attached and in good condition.
Step 2: Position And Secure The Glass
- Place the cleaned, marked glass on your backing material.
- Secure the glass in place with clamps or by enlisting a helper to hold it steady.
- Ensure the marked spot is easily accessible and not near the edge.
Step 3: Apply Water Or Coolant
- Place a small dam (a ring of modeling clay or putty) around the drilling area to hold water.
- Pour a small amount of water into the dam; this keeps the bit cool and flushes away glass dust.
Step 4: Start Drilling, Low Speed, High Control
- Set the drill to its lowest speed.
- Hold the drill at a 90-degree angle to the glass surface.
- Gently touch the bit to the marked spot, applying only light pressure.
- Begin drilling slowly; let the bit do the work. Never force it.
After the initial groove is formed (about 10, 20 seconds):
- Increase pressure very slightly, maintaining a slow and steady pace.
- Keep the area wet at all times; pause if necessary to add more water.
Step 5: Complete The Hole
- As the bit nears the far side of the glass, reduce pressure further to avoid chipping.
- If accessible, finish the hole by flipping the glass and drilling from the opposite side for the last 1, 2 mm. This “back-drilling” technique yields a cleaner exit.
Step 6: Clean And Inspect
- Rinse the glass with water, removing all debris and tape.
- Inspect the hole for smoothness; if needed, sand gently with fine-grit sandpaper or a diamond file.
Example: Drilling A Wine Bottle For A Lamp Project
When converting a wine bottle into a lamp, I followed this process: after marking the spot on the bottle’s lower side, I used a diamond-tipped bit and a putty dam for water. Drilling at low speed, I paused every 20 seconds to check progress and add water. The hole turned out perfectly smooth, ready for wiring, demonstrating the value of patience and proper cooling.
Advanced Techniques And Troubleshooting For Glass Drilling
As you gain experience, you may encounter projects requiring more advanced skills or face unexpected challenges. Here’s how to handle these situations.
Drilling Large Holes
For holes larger than 1/2 inch:
- Use a diamond hole saw rather than a standard bit.
- Apply a steady stream of water, possibly with a continuous drip system.
- Start with a pilot hole to guide the hole saw, or use a template for accuracy.
- Drill in short bursts to reduce heat buildup.
Preventing And Repairing Chips
Chipping occurs most often at the drill’s exit point. To minimize:
- Always use masking tape on both sides.
- Drill halfway from one side, then finish from the other.
- Support the exit side with a backing material.
Minor chips can sometimes be smoothed with a diamond file. However, deep cracks or breaks usually mean starting over.
Dealing With Thick Or Laminated Glass
Thicker glass requires:
- Even slower drilling speeds.
- More frequent cooling pauses.
- Occasional withdrawal of the bit to clear dust and allow water to penetrate.
For laminated glass, proceed slowly and be prepared for increased resistance as the bit moves through the plastic interlayer.
Example: Aquarium Glass Repairs
A hobbyist needed to add a bulkhead fitting to a 12mm-thick aquarium wall (not tempered). Using a diamond hole saw, he drilled at low speed with constant water flow, pausing every 30 seconds. The process took nearly 10 minutes, but the resulting hole was flawless, a testament to patience and proper technique.
Troubleshooting Common Problems
- Cracking: Usually caused by excessive speed or pressure. Slow down, lighten up, and increase water flow.
- Bit Slipping: Start at an angle, then straighten up after the bit has scored the surface.
- Cloudy or Rough Holes: Use higher-quality bits and maintain better cooling.
Real-world Examples And Applications
Drilling holes in glass is a valuable skill for both practical and creative endeavors. Here are some real-world applications and case studies.
Custom Glass Shelving
Interior designers frequently drill holes in glass shelves to accommodate mounting hardware or cable passes. Using jigs for repeatable accuracy and diamond-tipped bits, clean holes can be achieved for a professional finish.
Glass Planter Drainage
Gardeners often repurpose glass jars or vases for plants. Drilling a small drainage hole at the bottom prevents root rot. The key is supporting the vessel well and using a slow, steady drilling technique to avoid cracking.
Art And Craft Projects
Artists working with stained glass often need to make precise holes for hanging or connecting pieces. In these cases, a Dremel rotary tool with a small diamond bit allows for delicate, controlled work, especially when working near decorative edges.
Example: Scientific Glassware Modification
In laboratory settings, technicians may need to modify beakers or flasks. According to the Wikipedia Glassworking page, specialized equipment and diamond bits are used to create ports or connectors without compromising vessel integrity.
Maintenance, Storage, And Bit Longevity
Proper care of your tools extends their life and ensures consistently clean holes in future projects.
Cleaning Drill Bits
After each use:
- Rinse bits in clean water to remove glass dust.
- Use a soft brush to clear any debris from the bit’s grooves.
- Dry thoroughly to prevent rust (especially on bits with steel shanks).
Storing Bits And Tools
Store bits in a protective case or foam-lined drawer, separated to prevent dulling. Keep drills and rotary tools in a dry, dust-free environment.
Extending Bit Life
- Use only for glass, not other materials.
- Maintain adequate cooling during every use.
- Replace bits when cutting slows or hole edges become rough.
Example: Comparing Bit Wear Over Time
A hobbyist tracked the lifespan of two types of bits:
| Bit Type | Number of Holes (before noticeable wear) | Cost per Bit | Average Cost per Hole |
|---|---|---|---|
| Diamond-Tipped | 40 | $12 | $0.30 |
| Carbide-Tipped | 12 | $4 | $0.33 |
Although more expensive, diamond-tipped bits provided better performance per hole, justifying their higher upfront cost for frequent users.
Safety Best Practices And Environmental Considerations
Drilling glass is inherently risky, but with the right precautions, it can be done safely. Environmental awareness is also increasingly important.
Personal Safety Protocols
- Always wear eye protection; even a small chip can cause injury.
- Use gloves to avoid cuts from sharp glass edges.
- Never drill alone; if possible, have someone nearby in case of emergency.
Handling And Disposal Of Glass Waste
- Collect all glass dust and chips in a dedicated container.
- Never dispose of glass shards in regular trash, use a puncture-proof container.
- Wipe work surfaces with a damp cloth to pick up fine particles.
Environmental Impact
- Reuse and recycle glass whenever possible.
- Avoid rinsing glass dust down the drain, as it can accumulate in pipes.
- Source glass and tools from environmentally responsible manufacturers.
For additional safety tips and environmental guidelines, consult the Occupational Safety and Health Administration (OSHA).
Frequently Asked Questions
What Is The Best Drill Bit For Glass, And Why?
The diamond-tipped drill bit is considered the best for glass due to its ability to grind through the surface without causing excessive stress. Diamond bits create smoother holes and last longer than carbide-tipped alternatives, especially for frequent or large-diameter drilling.
Can I Drill A Hole In Tempered Glass At Home?
No, you should not attempt to drill into tempered glass at home. The tempering process introduces stresses that make the glass extremely sensitive to any cutting or drilling, resulting in immediate and total shattering. Holes must be made before the glass is tempered, typically at the factory.
How Do I Avoid Cracking The Glass When Drilling?
To minimize the risk of cracks, use low drill speeds, keep the glass cool with water, apply only gentle pressure, and support the glass fully. Masking tape helps prevent chipping, and drilling halfway from each side can further reduce exit cracks.
What Should I Do If My Drill Bit Keeps Slipping On The Glass Surface?
If your drill bit slips, try placing a small piece of masking tape over the drilling spot to provide extra grip. Starting the drill at a slight angle and then straightening out once the bit has scored the glass can also help prevent wandering.
Is It Possible To Enlarge An Existing Hole In Glass?
Yes, but it requires extra care. Use a slightly larger diamond-tipped bit and proceed slowly, keeping the area wet. To prevent chipping, secure the glass and use a template or guide to keep the bit centered. It’s easier to enlarge holes in annealed glass than in decorative or laminated types.
Drilling holes in glass is a skill that combines patience, preparation, and the right equipment. From choosing the ideal bit and carefully setting up your workspace to mastering advanced techniques for thick or delicate glass, each step contributes to a successful outcome.
With attention to safety and a methodical approach, you can confidently add custom holes to glass for projects ranging from practical repairs to stunning art. In my experience, the satisfaction of a clean, flawless hole in glass is well worth the effort, so equip yourself, follow best practices, and let your creativity shine.