Drilling into granite is a task that strikes fear into many DIYers and even seasoned professionals. Granite’s legendary hardness, beauty, and durability make it a prized material for countertops, tiles, and outdoor features, but these same attributes make it a formidable opponent for standard tools.
Whether you want to install a faucet in a granite countertop, anchor a railing, or run wiring through a granite wall, knowing how to drill granite properly is essential. Done incorrectly, you risk damaging the stone, ruining your tools, or even injuring yourself.
Yet, with the right preparation, equipment, and technique, drilling into granite can be performed safely and efficiently. This guide draws on expert recommendations, real-world examples, and proven best practices to provide you with a comprehensive, step-by-step approach. You’ll learn how to select the right drill and bit, how to prepare your workspace, and how to avoid the most common mistakes.
If you’re ready to master this challenging but rewarding skill, read on for everything you need to know about drilling into granite.
Key Takeaways
- Select specialized diamond or carbide-tipped drill bits designed for stone to effectively penetrate granite.
- Proper preparation, including marking the hole, securing the granite, and using protective gear, is critical for safety and accuracy.
- Use low drill speeds, steady pressure, and continuous water cooling to prevent overheating and bit damage.
- Avoid common mistakes like using the wrong bit, skipping water cooling, or applying excessive force.
- Real-world examples and comparison tables in this article help you choose the right tools and techniques for your specific granite drilling project.
Understanding Granite And Its Challenges
Granite is a natural igneous rock formed from cooled magma, composed mainly of quartz, feldspar, and mica. Its appeal lies in its exceptional hardness, making it resistant to scratches and heat, and its unique coloration. However, these characteristics that make granite desirable for construction also make it one of the most difficult stones to drill.
Why Is Granite So Hard To Drill?
Granite’s hardness is rated between 6 and 7 on the Mohs scale, just below top-tier minerals like diamond and corundum. Its interlocking crystalline structure offers little give, and conventional steel or masonry bits quickly dull or break. As a result, drilling into granite requires specialized diamond-tipped or carbide-tipped drill bits, along with careful technique.
Common Applications For Drilling Granite
Drilling is required for tasks such as:
- Installing faucets in granite countertops
- Mounting brackets, railings, or handrails
- Running electrical or plumbing lines through granite walls
- Anchoring outdoor fixtures like mailboxes or lights
Each application may call for different bit types, hole sizes, and drilling techniques.
Risks Of Improper Granite Drilling
Drilling granite without proper tools and technique can lead to:
- Cracked or chipped granite
- Broken drill bits
- Overheating and tool damage
- Injury from flying debris or tool kickback
Understanding these risks is key to safe and successful drilling.

Credit: www.youtube.com
Choosing The Right Tools And Equipment
Selecting the right equipment is the foundation of a successful granite drilling project. While many tools look alike, only a subset are built to withstand granite’s relentless hardness.
Drill Types: Rotary Vs. Hammer Drills
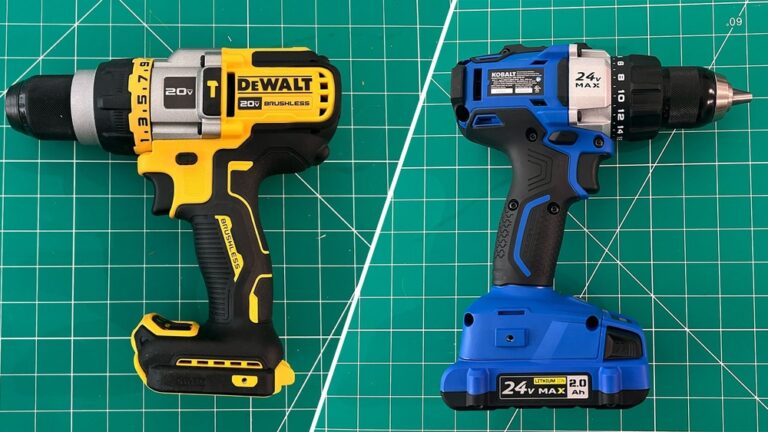
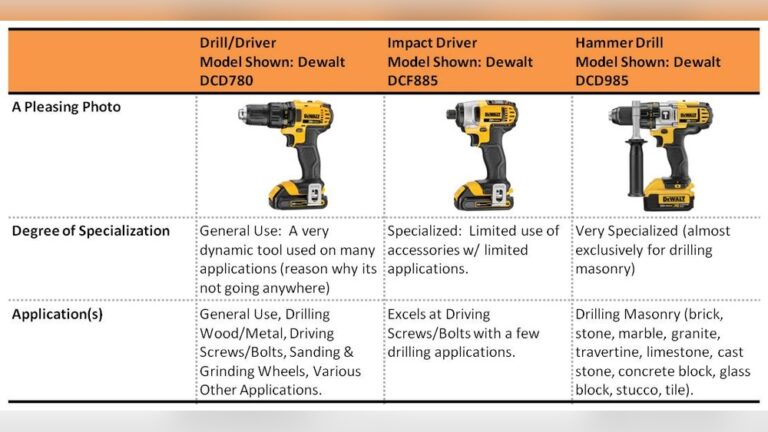
Standard rotary drills and hammer drills are the primary options. Hammer drills deliver a pulsing action, ideal for concrete but often too aggressive for granite, risking cracks and chips. In my experience, a rotary drill with variable speed control is best for precision and safety.
Drill Bit Comparison: Diamond Vs. Carbide Vs. Masonry
The drill bit is the most critical component. Below is a comparison of the main types:
| Bit Type | Material | Durability | Efficiency on Granite | Typical Cost |
|---|---|---|---|---|
| Diamond-tipped | Industrial diamond | Excellent | Best | High |
| Carbide-tipped | Tungsten carbide | Good | Moderate | Medium |
| Masonry | Hardened steel | Poor | Poor | Low |
Diamond-tipped bits are the gold standard for granite, offering superior cutting ability and longevity. Carbide-tipped bits are suitable for occasional use or softer granite but wear faster. Standard masonry bits are not recommended.
Essential Accessories
To drill granite safely and effectively, you’ll also need:
- Drill guide or template to prevent bit wandering
- Water cooling system (spray bottle, hose, or sponge)
- Protective gear: Safety glasses, gloves, ear protection, and a dust mask
- Clamps or supports to secure the granite slab
- Vacuum or dust extraction for indoor work
Having these on hand streamlines the process and improves results.
Tool Brands And Where To Buy
Leading brands for granite drilling equipment include Bosch, DeWalt, and Makita. For diamond-tipped bits, look for specialized stoneworking suppliers. Major retailers like Home Depot and Lowe’s also stock suitable options. For more on diamond tools, check out this Wikipedia page on diamond tools.

Credit: www.wikihow.com
Preparing For Granite Drilling
Preparation is the stage where most mistakes are made or avoided. Proper planning and setup can mean the difference between a clean, accurate hole and a costly disaster.
Inspecting And Marking The Granite
First, inspect the granite for natural veins, cracks, or weak spots. Drilling near these areas increases the risk of splitting. Mark the exact spot with a grease pencil or masking tape, which also prevents bit slipping.
Securing The Granite Slab
Movement during drilling can cause chips or cracks. If drilling a countertop, support the underside with wood blocks or foam. For tiles or loose slabs, use sturdy clamps to hold the granite in place.
Setting Up Water Cooling
Granite drilling generates intense heat, which can damage both the bit and the stone. Set up a water delivery system:
- Use a spray bottle for small jobs
- Employ a wet sponge to deliver a steady trickle
- For large holes, consider a drill guide with a built-in water reservoir
Water cooling is non-negotiable for granite.
Safety Precautions
Equip yourself with protective eyewear, gloves, and a dust mask. Ear protection is also recommended, as drilling granite is noisy. Keep your workspace clear of distractions and bystanders.

Credit: www.wikihow.com
Step-by-step Granite Drilling Process
With tools and preparation complete, you’re ready to drill. Follow these steps for best results.
Step 1: Position And Anchor The Drill
Place the drill bit perpendicular to the granite’s surface. Use a drill guide or template for accuracy. Start at a low speed to avoid bit wandering.
Step 2: Start Drilling With Light Pressure
Apply gentle, steady pressure. Let the bit grind into the granite, do not force it. Excessive force can shatter the stone or snap the bit.
Step 3: Use Continuous Water Cooling
Constantly apply water to the drilling area. This cools the bit, reduces dust, and prolongs tool life. For vertical surfaces, have a helper spray water, or use a sponge trickling water onto the bit.
Step 4: Increase Speed Gradually
Once the bit establishes a groove, increase drill speed moderately. Maintain steady water flow and avoid overheating. If you notice smoke or steam, stop and let the area cool.
Step 5: Drill In Short Bursts
Work in 15, 20 second intervals. Withdraw the bit periodically to clear debris and allow water to reach the hole’s base. This reduces the risk of binding or overheating.
Step 6: Complete The Hole
As you approach the end, reduce pressure to prevent blowout on the exit side. For through-holes, consider clamping a sacrificial backing board to the underside to catch chips.
Step 7: Clean Up
Remove debris with a vacuum or damp cloth. Inspect the hole for chips or cracks. If needed, smooth rough edges with a diamond hand file.
Real-world Examples And Case Studies
Seeing granite drilling in action helps clarify what works, and what doesn’t.
Example 1: Installing A Faucet In A Granite Countertop
A kitchen remodel required adding a faucet hole to a pre-installed granite countertop. The homeowner used a diamond core bit and a portable drill with variable speed. They marked the location with masking tape, supported the underside with wood blocks, and kept a steady stream of water with a helper’s spray bottle. The result: a clean, chip-free hole completed in under 10 minutes.
Pro Tip: For holes over 1″ in diameter, use a core bit rather than a standard twist bit for smoother edges.
Example 2: Mounting A Handrail On An Outdoor Granite Step
A contractor needed to anchor a handrail in outdoor granite steps. They selected a carbide-tipped masonry bit (due to lower cost) and a rotary hammer drill. Despite using water cooling, the bit dulled after just two holes, and the granite chipped around one anchor. The lesson: diamond bits are worth the extra investment for clean, repeatable results.
Example 3: Drilling Through Granite Tile For Electrical Wiring
An electrician ran wiring through granite tile during a bathroom renovation. They used a diamond-tipped hole saw, a drill guide, and a wet sponge for cooling. To minimize tile breakage, they drilled halfway from one side, then flipped the tile to finish from the other side. This two-stage approach prevented blowout and kept the tile intact.
Common Mistakes And How To Avoid Them
Many granite drilling mishaps are preventable. Here are some of the most frequent errors and strategies to avoid them.
Using The Wrong Drill Bit
Attempting granite with a standard masonry or wood bit is a common mistake. These bits can’t cut hard stone and often lead to frustration or damage. Always use diamond-tipped or, for small jobs, carbide-tipped bits.
Skipping Water Cooling
Some users overlook water cooling, relying on “tough” bits to get the job done. This leads to overheating, rapid bit wear, and even granite discoloration. Always apply water liberally.
Applying Excessive Force
Forcing the bit through granite causes chips, cracks, and broken tools. Let the drill and bit do the work. If progress stalls, withdraw the bit, clear debris, and resume.
Drilling Near Edges Or Veins
Drilling too close to an edge or natural vein risks splitting the granite. Maintain at least 1, 2 inches from any edge or visible flaw.
Failing To Secure The Granite
Loose slabs or countertops can shift, causing inaccurate holes or dangerous kickback. Use clamps, supports, or backing boards for stability.
Advanced Tips And Techniques
For ambitious projects or professional results, these advanced strategies can make a difference.
Using Drill Guides And Templates
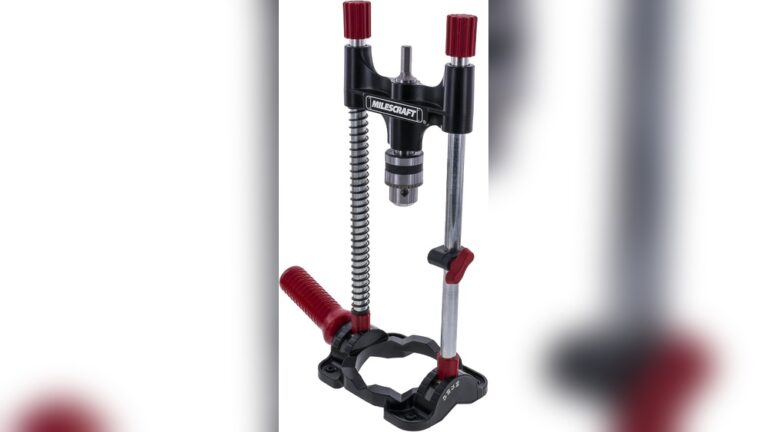
A drill guide helps keep the bit centered and perpendicular, especially on polished granite where bits tend to wander. Commercial guides with suction cups or adhesive bases are available, or you can make a DIY template from scrap wood.
Step Drilling For Large Holes
For holes over 1/2″, start with a small pilot hole using a 1/4″ diamond bit. Then switch to a larger core bit. This reduces stress on the granite and yields cleaner edges.
Managing Dust And Slurry
Even with water cooling, granite drilling produces a slurry of stone dust and water. Use a shop vacuum with a fine filter, or place towels around the work area to contain the mess.
Polishing And Sealing After Drilling
Drilled holes may have rough or porous edges. Use a diamond hand file to smooth them, and apply a stone sealer to prevent moisture intrusion and staining.
Table: Granite Drilling Methods Comparison
| Method | Best For | Pros | Cons |
|---|---|---|---|
| Diamond-tipped bit with water cooling | Countertops, tiles, all granite types | Clean holes, minimal chipping | Higher initial cost |
| Carbide-tipped bit with water cooling | Small jobs, softer granite | Lower cost, decent results | Wears quickly, not for thick granite |
| Hammer drill with masonry bit | Concrete, not recommended for granite | Fast in concrete | Chips and cracks granite |
Comparing Drilling Granite To Other Stone Types
Granite is not the only hard stone encountered in construction and home improvement. Here’s how it compares to other popular materials.
Table: Stone Hardness And Drillability
| Stone Type | Mohs Hardness | Best Drill Bit | Drilling Difficulty |
|---|---|---|---|
| Granite | 6, 7 | Diamond-tipped | Challenging |
| Marble | 3, 5 | Carbide-tipped | Moderate |
| Quartzite | 7, 8 | Diamond-tipped | Very Difficult |
| Limestone | 3, 4 | Masonry bit | Easy |
| Slate | 2.5, 4 | Carbide-tipped | Easy |
As shown, granite is harder than marble, limestone, and slate, but slightly less challenging than quartzite. Always verify the stone type before drilling.
Maintaining Your Tools For Longevity
Tool care directly impacts drilling success and cost over time.
Cleaning Bits After Use
After drilling, rinse diamond or carbide bits under water to remove stone slurry. Dry thoroughly to prevent rust or corrosion.
Inspecting For Wear
Check bits for dullness, cracks, or missing diamonds. Replace worn bits promptly, dull tools increase the risk of damage and injury.
Storing Tools Properly
Store bits in their protective cases, away from moisture and impact. Keep drills and accessories organized and clean.
Sharpening Or Replacing Bits
Diamond bits cannot be sharpened, but carbide bits can sometimes be touched up with a diamond file. When in doubt, replace rather than risk a failed hole or damaged granite.
Environmental And Safety Considerations
Granite drilling generates dust, noise, and waste. Addressing these impacts protects both health and the environment.
Managing Silica Dust
Granite contains crystalline silica, which can cause silicosis if inhaled. Always use wet drilling methods to minimize airborne dust, and wear an N95 or higher-rated dust mask.
Noise Control
Drilling granite is loud, often exceeding 85 decibels. Use ear protection and limit exposure time. Warn others nearby before starting.
Waste Disposal
Collect and dispose of stone slurry and broken bits according to local regulations. Do not wash slurry into storm drains, as it can clog pipes and pollute waterways.
Minimizing Water Waste
Use only as much water as needed for cooling, and collect runoff with towels or buckets for proper disposal.
For more information on safe stoneworking practices, visit the OSHA silica safety page.
Frequently Asked Questions
What Is The Best Drill Bit For Granite Countertops?
The diamond-tipped drill bit is considered the best for granite countertops. Its industrial diamond particles efficiently cut through hard stone, producing clean holes with minimal chipping. Carbide-tipped bits work for small jobs but wear quickly. Always use water cooling for either type to maximize bit life.
How Can I Prevent My Granite From Cracking While Drilling?
To prevent cracks, avoid drilling near edges or natural veins, secure the granite firmly, use a drill guide to maintain bit stability, and always apply water for cooling. Start with light pressure and increase gradually. For through-holes, support the underside with a backing board.
Is It Safe To Drill Granite Indoors?
Drilling granite indoors is safe if proper precautions are taken. Wet drilling reduces dust, but always ventilate the area and use a shop vacuum to clean up slurry. Wear a dust mask, safety glasses, and ear protection. Protect surrounding surfaces with drop cloths or plastic sheeting.
Can I Use A Regular Drill To Drill Into Granite?
A standard rotary drill with variable speed can be used for granite, but only when paired with a diamond-tipped bit and water cooling. Avoid hammer drills, as their impact action can crack the stone. For large holes or extended projects, a drill with higher torque and power is beneficial.
How Do I Polish A Hole Drilled In Granite?
To polish a drilled hole, use a diamond hand file or sanding pad to smooth rough edges. Start with a coarse grit and progress to finer grits for a polished finish. Clean the area thoroughly, then apply a stone sealer to protect against moisture and staining.
Drilling into granite is challenging but achievable with the right tools, preparation, and technique. By following expert advice and proven methods, you can achieve clean, professional results, whether you’re installing a new fixture, running utilities, or creating custom stonework. Take your time, respect the material’s hardness, and invest in quality equipment for the best outcome.