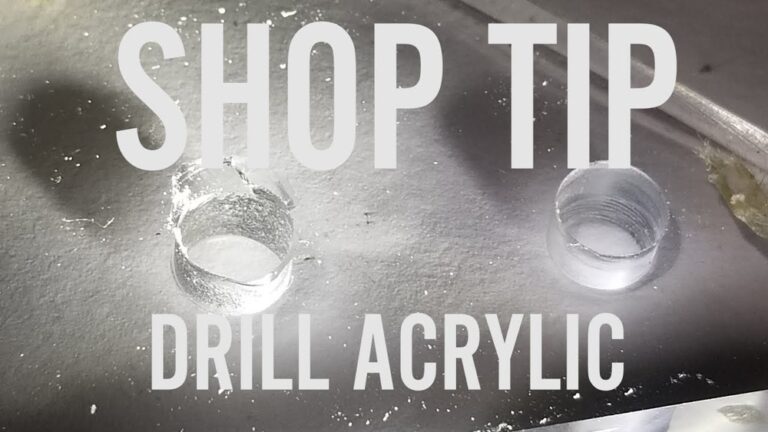
Drilling holes in plastic might sound simple, but doing it right takes more than just grabbing a drill. If you move too fast or use the wrong bit, plastic can crack, melt, or even shatter. But with the right tools and a few careful steps, you can make clean, accurate holes in almost any kind of plastic—whether you’re building a DIY project, fixing household items, or working on electronics. This guide will show you every detail: from choosing the best drill bits to avoiding the most common mistakes. You’ll also see tips that most beginners miss, so you get pro results every time.
Understanding Plastics: Why Material Matters
There are many types of plastic, and each reacts differently when you drill into it. Knowing your material helps you pick the right tools and technique.
Common Plastic Types
- Acrylic (Plexiglass): Hard, clear, and brittle. Tends to crack if drilled too fast.
- Polycarbonate (Lexan): Tough and flexible. Can handle more pressure, but still needs care.
- PVC: Used in pipes and fittings. Soft, but melts if overheated.
- ABS: Found in electronics and toys. Medium hardness, easy to drill.
- Polyethylene & Polypropylene: Used in containers. Waxy texture, can deform under heat.
Each plastic has a different melting point and strength. For example, acrylic melts at about 160°C (320°F), while polycarbonate is closer to 150°C (302°F). Softer plastics like polyethylene can even clog drill bits with melted shavings if you go too fast.
Why This Matters
If you use the same method for every plastic, you risk ruining your project. For example, a twist drill bit can crack acrylic but works fine on ABS. Polycarbonate resists impact, but PVC can melt and gum up your tool.
By matching your technique to the material, you get better, safer results.
Tools And Materials: What You’ll Need
Before you start, gather the right tools. Here’s what you need for safe, clean drilling into plastic.
Essential Tools
- Drill: Any handheld power drill or drill press works. For small holes, even a rotary tool like a Dremel is okay.
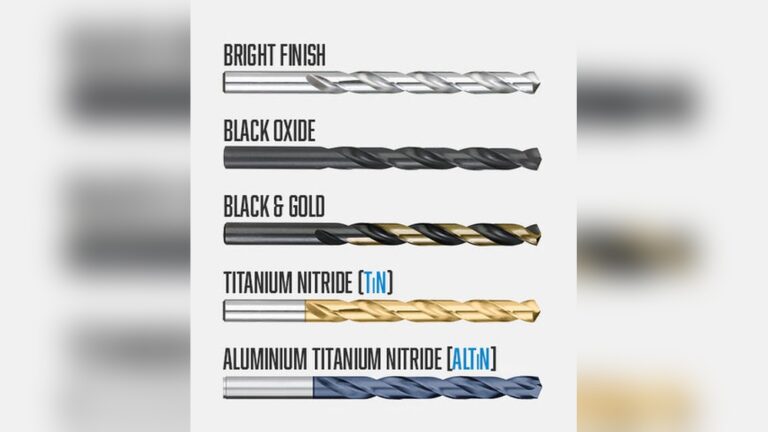
- Drill bits: The most important choice. Common types:
- Brad point bits: Best for plastics. The point keeps the bit from wandering.
- Twist bits: Work for soft plastics, but can crack brittle types.
- Step bits: Excellent for larger holes. They cut gently and reduce stress.
- Forstner bits: For wide, flat-bottomed holes in thick plastics.
- Clamps: To hold the plastic steady and prevent spinning.
- Masking tape: Placed over the spot to prevent chipping.
- Marker: For marking hole positions.
- Scrap wood backing: Placed under the plastic to reduce blowout.
- Vacuum or brush: For cleaning plastic shavings.
Helpful Extras
- Speed control: Some drills let you adjust RPM. Slower speeds are safer for plastic.
- Lubricant: A drop of water or light oil can keep the bit cool.
- Safety glasses: Always protect your eyes from flying chips.
- Dust mask: For sanding or drilling large amounts.
Tool Comparison
Here’s a quick look at which drill bits work best with different plastics:
| Plastic Type | Best Drill Bit | Drill Speed | Extra Precautions |
|---|---|---|---|
| Acrylic | Brad point, Step bit | Low | Tape surface, go slow |
| Polycarbonate | Twist, Step bit | Medium | Use clamps |
| PVC | Twist bit | Low | Cool bit often |
| ABS | Brad point, Twist bit | Medium | Support underneath |
Credit: www.youtube.com
Preparation Steps: Setting Up For Success
Getting ready is half the battle. Good setup prevents most mistakes.
Marking The Hole
First, use a marker or a scribe to mark exactly where you want the hole. For smooth plastics, a center punch makes a small dent to keep the bit from slipping.
Supporting The Plastic
Always place your plastic on a flat, solid surface. A scrap piece of wood under the drilling spot supports the plastic and prevents the bit from breaking through too hard. This is called a backer board.
Securing The Workpiece
Plastic can spin or catch on the drill, which is dangerous. Use clamps to hold the plastic firmly. For small parts, consider a vise lined with soft material (like rubber) to avoid scratches.
Protecting The Surface
If your plastic is clear or glossy, stick a piece of masking tape where you’ll drill. The tape keeps the bit from chipping the edge and makes marking easier. Remove it after you finish.
Choosing The Right Drill Bit And Speed
The drill bit and speed you choose make a big difference. Here’s how to pick the best combo.
Drill Bit Selection
- Brad point bits have a sharp center point, so they start cleanly and don’t wander. These are best for acrylic and ABS.
- Twist bits are good for soft plastics but can cause cracks in hard, brittle plastics. Use sharp, new bits.
- Step bits cut in stages, creating large holes with less stress. Ideal for sheet plastics.
- Forstner bits cut flat-bottomed holes but heat up quickly. Use only for thick plastics.
Drill Speed (rpm)
Lower speeds (500–1,000 RPM) are best for most plastics. High speeds cause melting and rough edges. For small holes (under 3mm), you can go a bit faster, but never as fast as you would with wood or metal.
Example Drill Bit Sizes
| Bit Type | Best For Hole Size | RPM Range |
|---|---|---|
| Brad Point | 2–10 mm | 700–1,000 |
| Step Bit | 4–32 mm | 500–800 |
| Twist Bit | 1–8 mm | 800–1,200 |
Drilling Process: Step-by-step Guide
Let’s walk through the drilling process in detail. Each step matters for safety and results.
1. Mark And Tape
Mark the drilling spot. Apply masking tape over the area if the plastic is glossy or brittle.
2. Center Punch (if Needed)
For hard plastics, lightly tap a center punch or nail at the mark. This helps the bit stay in place.
3. Set Up And Clamp
Place the plastic on the backer board. Clamp both down to your work surface. Double-check that everything is stable.
4. Choose And Insert The Bit
Select the right drill bit. Insert it into your drill and tighten the chuck firmly.
5. Set The Drill Speed
Adjust your drill to a low or medium speed. If your drill doesn’t have settings, squeeze the trigger gently.
6. Start Drilling
Hold the drill perpendicular to the plastic. Start slowly. Let the bit do the cutting—do not force it. If using a hand drill, use both hands for control.
- For thin plastics, stop as soon as you feel the bit break through.
- For thick plastics, pause occasionally to clear shavings.
7. Cool The Bit
If you’re making several holes, pause to let the bit cool, or dip it in water. Overheated bits cause melting and rough holes.
8. Finish And Clean
Remove the tape and inspect the hole. If the edge is rough, use a deburring tool or fine sandpaper to smooth it. Clean away all shavings.
Step-by-step Comparison
Here’s a quick comparison between drilling plastic and drilling wood:
| Action | Drilling Plastic | Drilling Wood |
|---|---|---|
| Drill Speed | Low to medium | Medium to high |
| Tape Needed | Often yes | Rarely needed |
| Bit Cooling | Important | Not needed |
| Common Problems | Melting, cracking | Splintering |
Advanced Techniques For Special Situations
Sometimes you need to drill large holes, very small holes, or work with extra-thin plastics. Here’s how to handle tricky cases.
Large Holes
For holes over 10mm, step bits are best. They cut gradually, reducing stress. Drill a small pilot hole first, then switch to the step bit. Go slowly to avoid heat buildup.
Small Holes
For holes under 2mm, use a sharp twist bit and high speed, but with almost no pressure. Let the bit do the work. Support the plastic well.
Thin Sheets
Thin plastics (under 2mm) can tear or crack easily. Use a backer board, tape, and a sharp bit. Start drilling with the bit almost touching the surface to prevent the bit from wandering.
Thick Plastics
For thick pieces, remove the bit every few seconds to clear shavings and cool down. This prevents melted plastic from clogging the hole.
Drilling Curved Surfaces
If you need to drill into a curved plastic item (like a pipe), tape the area and use a center punch. Start with a very small bit for a pilot hole, then enlarge carefully.
Countersinking
If you want screws to sit flush, use a countersink bit after drilling. Test on scrap plastic first to avoid cracks.

Credit: rlopezxl.com
Avoiding Common Mistakes
Even experienced DIYers make mistakes when drilling plastic. Here’s how to avoid the most frequent problems:
Cracking
Cracks happen when you use too much force, drill too fast, or use the wrong bit. Always go slow and use the right bit for the plastic type. Taping the surface and supporting the plastic reduce cracking.
Melting
Melting is usually from high speed or a dull bit. Slow down, keep the bit sharp, and clear shavings often. For thick plastics, pause and cool the bit every few seconds.
Ragged Holes
Ragged edges come from dull bits, no support, or using the wrong bit. Always support the plastic, use sharp bits, and clean up with sandpaper if needed.
Bit Wandering
If the bit moves before cutting, your hole will be off-center. Use a center punch, start at an angle, or drill a small pilot hole first.
Unsafe Workpiece
If the plastic moves, you risk injury and a ruined project. Always clamp your workpiece securely.
Non-obvious Insights For Perfect Holes
Most guides miss these small but powerful tips:
- Pre-drill with a hot needle: For tiny holes (like for electronics), you can heat a needle and melt a starter hole. This stops bits from wandering.
- Reverse the drill at the end: For thick plastics, briefly reverse the drill at the end of the hole. This pulls out chips and leaves a cleaner exit.
- Use dish soap as lubricant: If you don’t have cutting fluid, a drop of dish soap works to keep bits cool.
- Check for static buildup: Drilling can cause static, making plastic shavings stick everywhere. Wipe surfaces with a damp cloth to remove static.
Safety Precautions
Drilling plastic is safer than metal, but there are still risks.
- Wear safety glasses: Shavings can fly up and scratch your eyes.
- Use a dust mask: Especially when drilling or sanding large amounts of plastic.
- Ventilate the area: Heated plastic can give off fumes. Open a window if possible.
- Keep hands clear: Never hold small pieces near the drill bit.
- Unplug tools when changing bits: Prevents accidental starts.
Cleaning Up And Finishing
After drilling, the hole edges might feel rough or have burrs. Here’s how to finish up:
- Use a deburring tool or a sharp knife to clean the inside and outside edges.
- For a smooth look, sand gently with fine (400–600 grit) sandpaper.
- Wipe the area with a damp cloth to remove dust and static.
- For clear plastics, polish with plastic polish for a transparent edge.
When To Use A Drill Press
A drill press gives more control and is perfect for repeated holes or thick plastics. It keeps the bit straight and applies even pressure. However, for most home projects, a handheld drill works well if you take your time.
Repairing Mistakes
If you crack or chip the plastic, all is not lost:
- For cracks, apply a small amount of solvent cement to bond the crack.
- For chipped holes, use a slightly larger bit or a step bit to smooth the edge.
- For off-center holes, plug with a plastic rod and re-drill.
Credit: www.drillbitwarehouse.com
Environmental And Health Considerations
Plastic dust and shavings are not biodegradable and can be harmful if inhaled. Always clean up carefully, and avoid washing shavings down the drain. Collect them for proper disposal.
Real-world Example
Let’s say you want to add a hole for a cable in an acrylic enclosure:
- Mark the hole spot.
- Tape over the area.
- Center punch the mark.
- Start with a 2mm brad point bit for a pilot hole.
- Switch to a 10mm step bit.
- Drill slowly, backing out to clear shavings.
- Remove tape, clean up edges with sandpaper, and polish if needed.
Frequently Asked Questions
What Is The Best Drill Bit For Plastic?
Brad point bits and step bits work best for most plastics. They cut cleanly and reduce the risk of cracking. Avoid spade bits or dull twist bits, as they can shatter brittle plastics.
How Do I Prevent Plastic From Cracking When Drilling?
Go slow, use the correct bit, and support the plastic with a backer board. Masking tape and a center punch also help prevent cracks.
Can I Use A Regular Metal Drill Bit For Plastic?
Yes, but it’s not ideal. Metal bits can work for soft plastics but may cause cracks or melting in hard plastics. Use sharp, slow speeds and avoid forcing the bit.
Is It Safe To Use Water As A Lubricant When Drilling Plastic?
Absolutely. A drop of water cools the drill bit and reduces melting. You can also use light oil or even dish soap. Avoid too much liquid, as it can make the plastic slippery.
What Should I Do If Plastic Melts On The Drill Bit?
Stop immediately, let the bit cool, and clean off the melted plastic. Reduce your drill speed and use a lubricant. If it happens often, switch to a sharper or different type of bit.
For more information on plastic types and their properties, visit Wikipedia’s Plastic Materials Overview.
Drilling holes in plastic isn’t hard when you understand the material and use the right approach. A little patience, preparation, and the proper tools will help you get professional results every time. Whether you’re making, fixing, or inventing, these steps will help you finish your project with confidence.