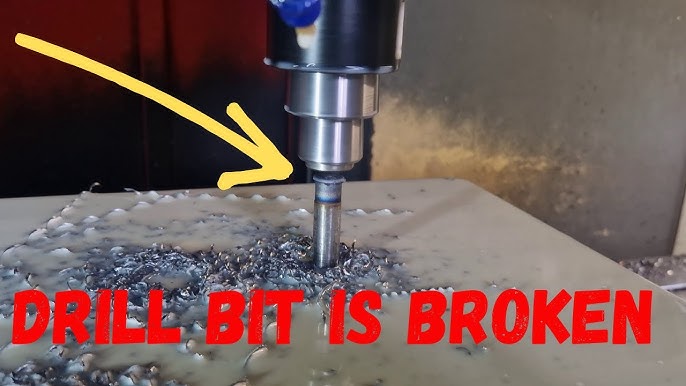
A broken drill bit stuck in a workpiece can quickly turn a simple project into a frustrating ordeal. Whether you’re a professional machinist, a dedicated DIY enthusiast, or a homeowner tackling repairs, dealing with a snapped drill bit is a challenge that demands precision, the right tools, and a steady hand. The stakes are high: forcing the wrong extraction method can damage your workpiece, your tools, and even cause injury. But with the proper technique, you can safely and efficiently extract the broken bit, minimize downtime, and preserve your materials.
This comprehensive guide covers every aspect of how to extract a broken drill bit, from understanding why bits break, to prevention strategies, step-by-step extraction methods, and real-world examples. Drawing from industry best practices and professional experience, you’ll learn which tools to use, when to seek help, and how to avoid common pitfalls. Whether the broken bit is embedded in wood, metal, or masonry, this article equips you with the knowledge and confidence to complete the task safely and successfully.
Key Takeaways
- Proper extraction tools and techniques are critical for safely removing broken drill bits without damaging your workpiece.
- Understanding why drill bits break helps you prevent future incidents and choose the best extraction strategy.
- There are multiple extraction methods (manual, chemical, professional) tailored to the material and bit depth.
- Safety precautions are essential to prevent personal injury and further equipment damage during extraction.
- Case studies and real-world examples illustrate successful solutions and common mistakes to avoid.

Credit: carnimad.es
Why Drill Bits Break: Causes And Prevention
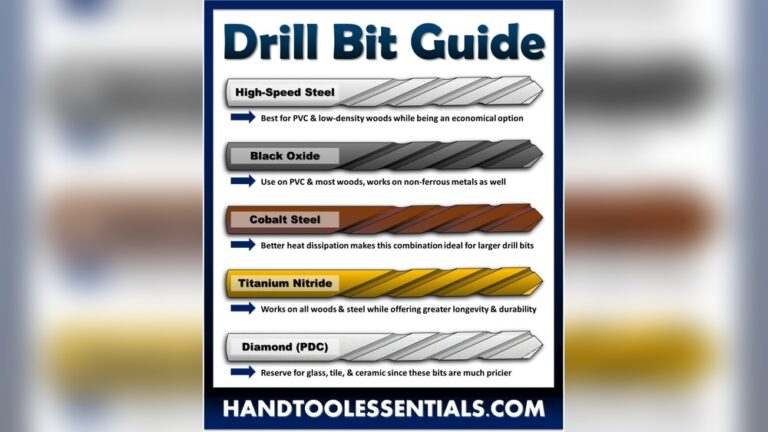
Understanding why drill bits break is the first step to both effective extraction and prevention. Drill bits are manufactured from high-speed steel, carbide, or cobalt alloys, each chosen for specific applications and strengths. Despite their durability, several factors can cause them to snap during use.
Common Causes Of Drill Bit Breakage
1. Excessive Force
Applying too much pressure can overload the bit, especially when working with hard materials like stainless steel or hardened alloys.
2. Improper Speed
Using the wrong RPM, especially drilling too quickly, generates heat, weakens the bit, and increases the risk of breakage.
3. Dull Or Worn Bits
Dull bits require more force and are more likely to catch, twist, and break inside the hole.
4. Incorrect Bit Type
Using a wood bit for metal, or vice versa, results in rapid wear and higher chances of snapping.
5. Misalignment
An off-center drill or a tilted bit can cause uneven stress and fracture the bit.
Prevention Strategies
- Always use the correct bit type for your material.
- Maintain sharpness by regularly inspecting and replacing or sharpening dull bits.
- Adjust drilling speed based on the material (consult manufacturer’s RPM charts).
- Apply consistent, moderate pressure rather than forcing the bit.
- Use lubricants (such as cutting oil) when drilling metals to reduce heat and friction.
- Secure your workpiece firmly to avoid slipping or misalignment.
Example:
When drilling stainless steel, using a cobalt bit at a lower RPM with cutting fluid significantly reduces the risk of breakage compared to a standard high-speed steel bit.
Credit: www.youtube.com
Assessing The Situation: Factors Before Extraction
Before starting any extraction process, a careful assessment ensures the right approach and minimizes further damage.
Material Type Matters
- Wood: Easier to work with; broken bits may be gripped or pushed out.
- Metal: Requires more precision; bits can be tightly wedged and difficult to access.
- Masonry/Concrete: Bits may be embedded deeply, requiring specialized techniques.
Bit Depth And Visibility
- Protruding bits are often easier to grip with pliers or locking tools.
- Flush or recessed bits need more advanced extraction methods.
Workpiece Value And Tolerance
- For critical or expensive components, the risk of damaging the workpiece during extraction may outweigh DIY attempts. Consider consulting a professional.
Tools And Workspace Readiness
- Ensure you have proper lighting, personal protective equipment (PPE), and a clean workspace before starting extraction.
Pro Tip:
Take a clear photo of the broken bit’s position before starting extraction. This helps if you need to consult a professional or reference the original orientation.

Credit: www.youtube.com
Manual Extraction Methods
For many scenarios, especially with protruding or easily accessible bits, manual extraction is effective and safe. The following techniques can be attempted before resorting to more invasive or chemical methods.
Using Locking Pliers Or Vice Grips
If the broken bit is protruding above the surface, locking pliers (such as Vise-Grip®) can often grip and twist the bit out.
Steps:
- Firmly attach the pliers to the exposed part of the broken bit.
- Rotate counterclockwise while applying steady pressure.
- If resistance is high, apply a small amount of penetrating oil and wait several minutes.
Warning:
Do not use excessive force, as this can shear off the exposed portion, making extraction more difficult.
Screw Extractor (easy-out) Method
A screw extractor is a specialized tool designed to remove broken screws, bolts, and drill bits.
Procedure:
- Use a center punch to create a small dimple in the center of the broken bit.
- Drill a small pilot hole into the center of the bit using a carbide-tipped drill (if possible).
- Insert the appropriate size extractor into the pilot hole.
- Turn the extractor counterclockwise using a tap wrench or adjustable spanner until the bit loosens and can be removed.
Comparison Table: Manual Extraction Tools
| Tool | Best For | Effectiveness | Cost |
|---|---|---|---|
| Locking Pliers | Protruding bits | High | Low |
| Screw Extractor | Recessed bits | Medium to High | Medium |
| Needle-Nose Pliers | Shallow bits in soft materials | Low to Medium | Low |
Center Punch And Hammer Method
For bits that are loose but slightly wedged, a center punch and hammer can sometimes dislodge the bit.
- Place the punch on the edge of the broken bit.
- Gently tap the punch to rotate or loosen the bit.
- Once loosened, use pliers to extract.
Left-handed Drill Bit Technique
A left-handed drill bit spins in the opposite direction of standard bits. When used with a reversible drill, it may catch and unscrew the broken bit while drilling a pilot hole for an extractor.
Steps:
- Select a left-handed drill bit slightly smaller than the broken bit.
- Drill into the center of the broken bit at a slow speed.
- If the bit catches, it may unscrew and remove the broken piece.
Example:
A machinist faced with a snapped 1/8″ drill bit in an aluminum block successfully removed it by using a left-handed drill bit, avoiding damage to the threaded hole.
Advanced And Professional Extraction Methods
When manual methods fail, or the bit is embedded deep within hard materials, advanced techniques are required. These may involve specialized equipment or professional services.
Edm (electrical Discharge Machining)
EDM is a non-contact method used primarily by machine shops to remove broken taps, bolts, and drill bits from valuable workpieces.
How It Works:
- A shaped electrode is used to erode the broken bit via electrical discharge, removing the metal without damaging the surrounding material.
Pros:
- Highly precise; minimal risk to workpiece integrity.
- Suitable for hardened materials.
Cons:
- Expensive and not typically available in home workshops.
Chemical Dissolution
Some chemicals, such as alum (aluminum potassium sulfate), can dissolve steel drill bits without damaging aluminum workpieces.
Steps:
- Create a saturated alum solution in hot water.
- Submerge or apply the solution to the area containing the broken bit.
- Over several hours to days, the bit dissolves.
Warning:
Chemical methods are slow and work best for small bits in aluminum. Always wear gloves and safety glasses.
Welding A Nut For Removal
For surface-level bits, a nut can be welded to the broken end, allowing removal with a wrench.
- Place a nut over the broken bit.
- Weld the center of the nut to the bit.
- Allow to cool, then use a wrench to unscrew.
Pro Tip:
This method requires skill with a welder and is best suited for steel workpieces.
Drilling Around The Bit
As a last resort, carefully drilling around the broken bit with a larger bit or end mill can free it. The hole can then be filled or re-tapped as needed.
Warning:
This can enlarge or damage the original hole and should only be attempted if other methods fail.
Example:
A professional restoration shop used EDM to remove a broken tap from a classic car engine block, preserving the original threads and avoiding costly replacement.
Safety Considerations And Best Practices
Extracting a broken drill bit involves risks to both the operator and the workpiece. Following safety protocols is essential.
Personal Protective Equipment (ppe)
- Safety glasses: Protect your eyes from metal shards and debris.
- Gloves: Prevent cuts from sharp bit fragments, but avoid wearing them near rotating tools.
- Ear protection: Use when drilling or hammering in enclosed spaces.
Workspace Safety
- Ensure stable clamping of the workpiece to prevent movement.
- Maintain a clean, well-lit area free of flammable materials.
Tool Inspection And Maintenance
- Regularly inspect extraction tools for wear, cracks, or deformation.
- Replace worn-out tools to prevent accidents.
Avoiding Further Damage
- Do not use power tools on sensitive or valuable workpieces unless necessary.
- If uncertain, consult with a professional machinist or repair shop.
Example:
In my experience, rushing extraction on a hardened steel shaft led to a snapped extractor and a more complex removal job. Patience and the right tool selection are key.
Case Studies: Real-world Extraction Scenarios
Examining real-world extractions highlights the importance of assessment, method selection, and patience.
Case Study 1: Broken Bit In A Wooden Door Frame
A homeowner drilling pilot holes for hinges snapped a bit in a wooden door frame. The bit protruded slightly above the surface.
Solution:
The user applied locking pliers, rotated gently, and extracted the bit without damaging the wood. The hinge was installed successfully with a new pilot hole drilled nearby.
Case Study 2: Snapped Bit In Hardened Steel
A machinist encountered a broken 3mm cobalt bit inside a hardened steel plate. Manual extraction failed due to the bit’s depth and hardness.
Solution:
The plate was sent to a machine shop, where EDM was used to remove the bit without enlarging the hole. The plate remained within tolerance, and production continued with minimal delay.
Case Study 3: Bit Stuck In Aluminum Engine Block
An automotive technician broke a steel bit inside an aluminum engine block. Chemical methods were chosen to avoid damaging the softer aluminum threads.
Solution:
A saturated alum solution was applied over several days. The steel bit dissolved, and the hole was re-tapped for a new bolt.
Lessons Learned
- Assessment before action is critical.
- Manual methods are best for accessible bits in soft materials.
- Professional techniques like EDM and chemical dissolution are essential for high-value or precision components.
Prevention: How To Avoid Breaking Drill Bits
Prevention is always better than extraction. Incorporate these practices to reduce the likelihood of bit breakage.
Use The Right Drill Bit And Accessories
- Select bits designed for the material (e.g., masonry bits for concrete, cobalt for hardened steel).
- Use pilot holes to ease the load on larger bits.
- Pair with appropriate drill chucks and secure the bit tightly.
Maintain Proper Drilling Technique
- Drill at the correct speed for your material.
- Apply steady, moderate pressure; let the bit cut, not force.
- Back out the bit periodically to clear debris.
Regular Maintenance
- Sharpen or replace dull bits promptly.
- Lubricate bits when drilling metal.
- Inspect for cracks, chips, or warping before use.
Secure The Workpiece
- Clamp materials firmly to prevent shifting.
- Use a drill press for precise, perpendicular drilling when possible.
Comparison Table: Prevention Strategies
| Prevention Method | Material | Effectiveness | Ease of Implementation |
|---|---|---|---|
| Lubrication | Metal | High | Easy |
| Pilot Holes | All | Medium to High | Medium |
| Correct Bit Selection | All | High | Easy |
| Use of Drill Press | Precision Work | Very High | Moderate |
Pro Tip:
Record the drill bit type, speed, and lubrication used on successful projects. This helps replicate safe practices and reduces future bit breakage.
Choosing The Right Extraction Tool: A Buyer’s Guide
Selecting the appropriate extraction tool depends on the bit’s accessibility, the workpiece material, and the project budget.
Locking Pliers And Needle-nose Pliers
Best for: Protruding bits in wood or soft metals
Pros: Low cost, widely available
Cons: Not effective for recessed bits
Screw Extractor Kits
Best for: Recessed or flush bits in metal, wood, or plastic
Pros: Versatile, reusable
Cons: Requires drilling a pilot hole; may not work on extremely hard bits
Left-handed Drill Bits
Best for: Bits that can be drilled into
Pros: May remove bit while preparing extractor hole
Cons: Needs precise centering
Edm Services
Best for: High-value workpieces, hardened steel
Pros: Non-destructive, high precision
Cons: Expensive, requires professional shop
Chemical Methods
Best for: Steel bits in aluminum
Pros: Non-mechanical, preserves threads
Cons: Slow, not suitable for all materials
Comparison Table: Extraction Tools and Methods
| Method | Workpiece Material | Skill Level Required | Cost | Time Required |
|---|---|---|---|---|
| Locking Pliers | Wood, Metal | Beginner | Low | 5-10 min |
| Screw Extractor | Wood, Metal | Intermediate | Medium | 10-30 min |
| Left-Handed Drill Bit | Metal | Intermediate | Medium | 10-20 min |
| EDM | Metal | Professional | High | 1-2 hours |
| Chemical Dissolution | Aluminum/Steel | Intermediate | Low | 8-48 hours |
Example:
According to Wikipedia, screw extractors have been a mainstay in machine shops since the early 20th century, offering a reliable solution for broken fastener removal.
When To Call A Professional
While many extraction methods can be performed at home or in the workshop, certain situations call for expert intervention.
High-value Or Sensitive Workpieces
For expensive, irreplaceable, or precision components (such as engine blocks, aerospace parts, or custom machinery), professional extraction minimizes risk.
Deeply Embedded Or Hardened Bits
When bits are broken deep within hardened steel, professional services such as EDM are often the only safe option.
Lack Of Proper Tools
If you lack the right extractors, left-handed bits, or chemical agents, a professional machinist or tool repair shop can perform the extraction quickly and safely.
Signs You Need Help
- Multiple failed DIY attempts have worsened the situation.
- The surrounding material is at risk of cracking or deformation.
- The project is time-sensitive or part of a warranty repair.
Example:
A custom motorcycle builder, after multiple failed attempts, relied on a specialist with EDM capabilities to remove a snapped bit from a frame without damaging paint or threads.
Pro Tip:
Consult local machine shops or repair centers with experience in broken tool extraction. They often offer free assessments and can recommend the safest method.
External Resource:
For more on advanced machining and extraction techniques, see Machinery Lubrication.
Frequently Asked Questions
What Should I Do If The Broken Drill Bit Is Stuck In A Wall?
If a bit is broken off in a wall (e. g. , drywall or masonry), first assess if it’s accessible. For bits protruding or flush with the wall, try using locking pliers or a screw extractor. If embedded in masonry, you may need a masonry screw extractor or to carefully chisel around the bit to free it.
Always check for electrical wires or plumbing before further action, and consider consulting a professional if the bit is deep or near critical infrastructure.
Can I Drill A New Hole Next To The Broken Bit?
Yes, in many cases, especially in wood or non-critical materials, you can drill a new hole nearby. Ensure the new hole does not compromise the structural integrity or the function of the part (e. g. , for hinges or fasteners).
If the location is critical, it may be better to extract the bit or repair the hole before proceeding.
What If The Broken Bit Is Carbide Or Another Very Hard Material?
Carbide bits are extremely hard and difficult to drill into with standard extractors. Specialized diamond-tipped tools or professional services like EDM are often required to remove them. Attempting to use conventional methods may damage your tools and workpiece.
Are There Extraction Methods Suitable For Plastic Or Composite Materials?
Yes, for plastic or composites, manual extraction methods such as needle-nose pliers, locking pliers, or screw extractors are preferred. Avoid chemical methods, as they may damage or discolor the plastic. Use caution with drilling or heating, as these materials can melt or deform.
Can Thread Repair Kits Help After Extraction?
Thread repair kits (such as Heli-Coil®) are useful if the extraction process damages the threads in metal workpieces. After removing the broken bit, use the kit to restore the thread and ensure a secure fit for fasteners or bolts. Always follow the kit instructions carefully for best results.
Extracting a broken drill bit requires a blend of patience, the correct tools, and an understanding of both the material and the situation. By following the strategies detailed above, you can confidently tackle most extraction scenarios while minimizing risk to your project and yourself.
Drawing from real-world examples and professional advice, this guide empowers you to solve one of the workshop’s most frustrating problems with skill and safety.