Choosing the right drill bit size for cabinet hardware might seem like a small detail, but it’s often the difference between a flawless kitchen transformation and a frustrating, costly mistake. Whether you’re upgrading handles on your bathroom vanity or installing brand-new cabinets in your dream kitchen, the size of your drill bit directly affects the fit and longevity of your hardware.
Missteps here can lead to loose pulls, splintered wood, or even the need to buy new doors altogether.
Many DIY enthusiasts and professional installers have faced the dilemma: Should you size your drill bit exactly to the hardware screw, go slightly smaller, or err on the side of a wider hole? The answer depends on the hardware, cabinet material, and even your installation tools. In this comprehensive guide, you’ll learn exactly which drill bit size to use for popular cabinet hardware, how to adjust for different woods and handle types, and what the pros do to achieve a polished, secure finish every time.
Key Takeaways
- The most common drill bit sizes for cabinet hardware are 3/16″, 5mm, and 1/4″, but the ideal size always depends on your specific screw and material.
- Material matters: Hardwoods, MDF, and laminate require different techniques and bit types for best results.
- Test drilling on scrap material is crucial to avoid damaging your actual cabinets.
- European hardware often uses metric sizing; always double-check your hardware’s specs.
- Use jigs or templates to ensure precise, repeatable placement and avoid costly mistakes.
- Upgrading cabinet hardware is a high-impact, low-cost project for home value and aesthetics.
Credit: www.homedepot.com
Understanding Cabinet Hardware Types And Their Requirements
Selecting the correct drill bit starts with knowing your hardware. Cabinet hardware can range from basic knobs and pulls to complex European hinges and specialty fasteners. Each requires a unique approach for perfect installation.
Knobs And Pulls
Cabinet knobs typically use a single mounting hole, while pulls (handles) require two. Most modern American hardware comes with machine screws sized #8-32 or M4, necessitating a hole just wide enough for a snug fit.
- Standard knob screws: Often use a 3/16″ (4.76mm) or 5mm drill bit.
- Pulls (handles): Require two holes, spaced to match the hardware’s “center-to-center” measurement, with the same bit size as knobs.
Example: If your pull’s screws measure 4mm in diameter, a 5mm drill bit creates just enough clearance for easy insertion without wobble.
Hinges And Specialty Hardware
European-style concealed hinges (like Blum or Salice) and other specialty hardware might require larger or differently placed holes.
- Concealed hinges: Often use 35mm forstner bits for cup holes, but for the mounting screws, a 2mm or 5/64″ pilot hole is typical.
- Magnetic catches or latches: May require even smaller bits, such as 1/16″, for precise pilot holes.
Metric Vs Imperial Sizing
Hardware sourced from Europe or Asia is usually measured in millimeters, while American products use inches. Always verify before drilling, as a 5mm bit is slightly larger than a 3/16″ (4. 76mm) bit.
Pro Tip: When in doubt, measure the screw’s diameter with calipers and select a bit just 0.5, 1mm larger for a snug but not forced fit.
How Drill Bit Size Affects Installation And Longevity
The size of your pilot hole impacts both the aesthetics and durability of your cabinet hardware installation. Understanding the mechanics can help you avoid common pitfalls and achieve professional results.
The Science Of Pilot Holes
A pilot hole is pre-drilled to guide the screw into the wood, preventing splitting and ensuring a tight grip. If the hole is too small, the screw may split the wood or become misaligned. Too large, and the screw threads won’t bite, resulting in loose hardware.
- Ideal pilot hole: Slightly smaller than the screw’s shank (the solid core, not including threads).
- Clearance hole: For through-bolted hardware, the hole should be just large enough for the screw to pass without resistance.
Material Considerations
Different cabinet materials respond uniquely to drilling:
- Hardwoods (oak, maple): Require precise, sharp bits to avoid splintering; a pilot hole is essential.
- Softwoods (pine): More forgiving, but still benefit from pilot holes for clean finishes.
- MDF/Particleboard: Prone to crumbling; use brad-point or dowel bits for clean entry and minimal tear-out.
Impact On Finish And Stability
A properly sized hole allows the hardware to sit flush against the cabinet and prevents shifting over time. Loose holes can cause handles to spin or wobble, while overtightened screws in undersized holes may deform or crack the wood.
Example: In my experience, using a slightly larger pilot hole in painted MDF cabinets greatly reduces the risk of chipping the paint edge, a common issue with tight-fitting hardware.
Recommended Drill Bit Sizes For Popular Cabinet Hardware
Choosing the right drill bit can be simplified by referencing the most common hardware types and their corresponding screw sizes. Below is a detailed breakdown and comparison table for quick reference.
Standard Knobs And Pulls
Most cabinet knobs and pulls come with #8-32 screws or M4 metric screws. For these, the ideal drill bit is:
- Imperial: 3/16″
- Metric: 5mm
Oversized Or Heavier Hardware
For extra-large or heavy-duty handles, screws may be thicker:
- Imperial: 1/4″
- Metric: 6mm
European Hardware
- Blum hinges: 35mm forstner bit for cup, 2mm, 2.5mm for screws
- Metric pulls/knobs: Typically 5mm or 6mm
Comparison Table: Drill Bit Sizes For Common Cabinet Hardware
| Hardware Type | Common Screw Size | Recommended Drill Bit (Imperial) | Recommended Drill Bit (Metric) |
|---|---|---|---|
| Standard Knobs | #8-32 or M4 | 3/16″ | 5mm |
| Standard Pulls | #8-32 or M4 | 3/16″ | 5mm |
| Oversized Pulls | M6 or 1/4-20 | 1/4″ | 6mm |
| Concealed Hinges | Euro Screw | 5/64″ | 2mm |
| Magnetic Catches | #4 | 1/16″ | 1.5mm |
Example: Upgrading Vintage Cabinets
When updating a set of 1960s cabinets with modern pulls, the original holes were 1/8″. Upgrading to standard 3/16″ holes allowed for a seamless fit with new hardware, without compromising the structural integrity of the thin cabinet doors.
Pro Tip: Bit Sizing For Decorative Screws
If your hardware features decorative screw heads (like domed or oversized), test the fit with both the screw and the hardware itself before drilling all holes. This avoids unsightly gaps around the hardware face.
Step-by-step Guide To Drilling Cabinet Hardware Holes
A systematic approach minimizes errors and ensures repeatable, professional results. Here’s a best-practice workflow used by professional installers.
1. Gather Your Tools
- Drill (corded or cordless)
- Drill bits (3/16″, 1/4″, 5mm, etc.)
- Hardware template or jig
- Pencil and measuring tape
- Masking tape
- Level
2. Mark Your Locations
Use a cabinet hardware template or create your own from cardboard. Mark hole centers with a pencil, double-checking measurements for symmetry and alignment.
Pro Tip: Apply masking tape where you’ll drill to prevent splintering and make pencil marks more visible.
3. Test Drill On Scrap Material
Always drill a test hole in a piece of scrap wood or a hidden cabinet section. Insert the hardware and screw to confirm the bit size before committing to visible cabinet faces.
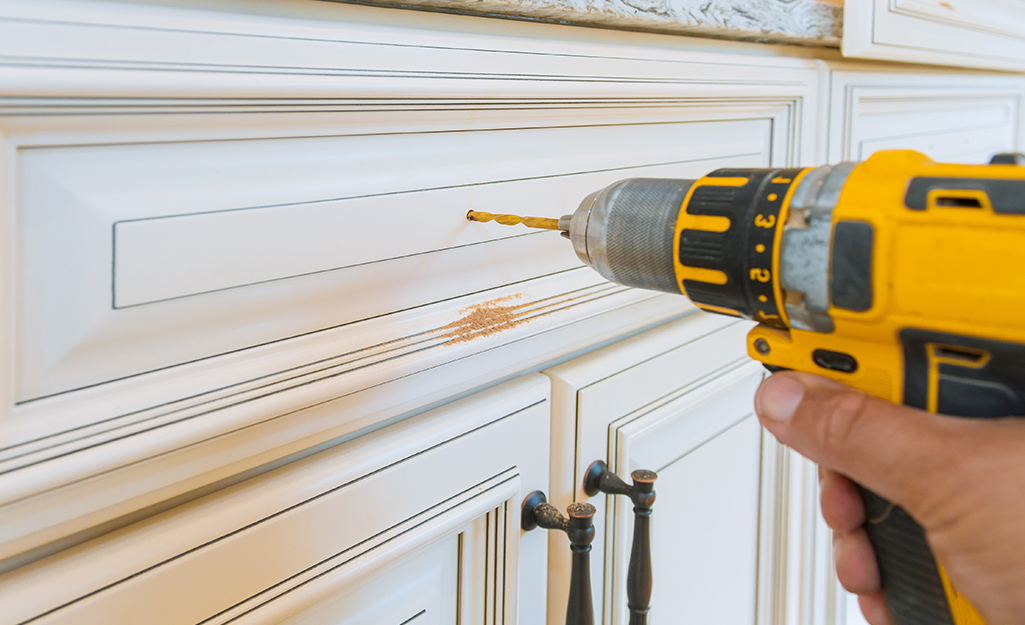
4. Drill The Hole
- Set your drill to a moderate speed.
- Hold the bit perpendicular to the surface.
- Drill slowly, letting the bit do the work, especially important for laminate or painted surfaces.
5. Install The Hardware
Insert the screw through the hardware and the hole, tightening by hand until snug. Avoid overtightening, which can strip the wood or deform the finish.
Example: Using A Hardware Jig
A professional installer working on a new kitchen used a Kreg Cabinet Hardware Jig to ensure every pull was perfectly aligned and evenly spaced. The result was a uniform, high-end look with no measurement errors, saving hours compared to manual measuring.
Adjusting For Different Cabinet Materials
Cabinets are made from a variety of materials, each requiring specific drill bits and techniques for best results.
Solid Wood Cabinets
- Use brad-point bits for clean entry and exit holes.
- Pre-drilling is essential to avoid splits, especially near door edges.
Mdf And Particleboard
- Use sharp, high-quality bits (preferably brad-point or dowel).
- Drill slowly to avoid “mushrooming” around the hole.
- Consider slightly larger pilot holes to accommodate wood swelling.
Laminate Cabinets
- Place masking tape on the drill location.
- Use a new, sharp bit and moderate speed.
- Drill from the front to avoid chipping the visible surface.
Comparison Table: Drill Bit Types For Cabinet Materials
| Cabinet Material | Recommended Drill Bit Type | Special Tips |
|---|---|---|
| Solid Wood | Brad-point | Clamp workpiece; drill pilot holes |
| MDF/Particleboard | Brad-point or Dowel | Drill slowly; use sharp bits |
| Laminate | Twist or Brad-point | Masking tape; drill from visible side |
Tools And Accessories For Accurate Cabinet Hardware Installation
Precision is key in cabinet hardware installation. The right tools can dramatically improve accuracy and reduce errors.
Cabinet Hardware Jigs
Hardware jigs are reusable guides that ensure consistent hole placement across multiple doors or drawers. They’re especially valuable for large kitchens or when installing hardware in batches.
- Adjustable for various handle lengths and hole spacings
- Speed up layout and prevent measurement errors
Drill Bit Types And Quality
Invest in high-quality brad-point or dowel bits for clean holes in wood and MDF. Cheap or dull bits can cause tear-out or splintering, especially on painted or veneered surfaces.
Measuring And Marking Tools
- Combination squares for verifying alignment
- Levels to ensure horizontal or vertical placement
- Center punches to help the bit start exactly where intended
Example: Measuring For Drawer Pulls
For a set of wide kitchen drawers, a template was used to align double pulls perfectly. This prevented the common mistake of misaligned handles, which can be especially noticeable on larger fronts.
Real-world Examples And Case Studies
Learning from real installations can clarify best practices and help you anticipate challenges unique to your project.
Case Study 1: Modernizing A Rental Kitchen
A property manager wanted to modernize a 20-year-old rental unit by replacing all cabinet hardware. Using a 3/16″ brad-point bit and a plastic hardware jig, they installed 40 new pulls in a single afternoon. The consistent hole size ensured every handle fit snugly, while the jig prevented measurement errors.
Case Study 2: Working With European Hardware
A homeowner purchased sleek, imported handles from Germany, which used M5 metric screws. After measuring the screw diameter with calipers, they selected a 5mm bit, resulting in a perfect fit. A test hole in scrap confirmed the fit before drilling into the actual cabinet doors.
Case Study 3: Avoiding Chipped Laminate
An installer working with glossy white laminate cabinets found that standard twist bits were causing chips around the holes. Switching to a sharp brad-point bit and applying masking tape to the drilling area eliminated the chipping, preserving the pristine finish.
Common Mistakes And How To Avoid Them
Even experienced DIYers and pros can make costly mistakes when installing cabinet hardware. Here’s how to sidestep the most frequent pitfalls.
Drilling Without Measuring Twice
Rushing through measurements can result in misaligned hardware. Always double-check with a tape measure and template before drilling.
Skipping The Test Hole
Drilling directly into visible cabinet faces without a test can lead to oversized or undersized holes, damaging both appearance and functionality.
Using Dull Or Incorrect Bits
A dull bit can cause splintering, while the wrong type of bit (e. g. , a masonry bit) will not cut cleanly through wood or laminate.
Over-tightening Screws
Forcing hardware screws into undersized holes or overtightening can crack wood or strip screw threads, weakening the installation.
Not Accounting For Handle Projections
Some pulls have unique shapes or projections that can interfere with adjacent drawers or doors if not properly positioned. Always dry-fit hardware before drilling.
Frequently Asked Questions
What If My Cabinet Hardware Screws Seem Too Short For My Doors?
If the provided screws are too short, measure the thickness of your cabinet door or drawer front and purchase matching machine screws in the correct length. Hardware stores typically carry #8-32 and M4 screws in various lengths, ensuring a secure fit for thicker materials.
Can I Use A Regular Twist Drill Bit For Cabinet Hardware Holes?
You can use a regular twist bit, but brad-point bits are highly recommended. Brad-point bits have a sharp center that helps prevent “walking” and produces a cleaner entry hole, reducing the chance of splintering, especially on painted or veneered surfaces.
How Do I Repair A Hole That’s Too Big For The Screw?
If you’ve accidentally drilled a hole too large, fill it with a wood dowel and glue, or use a commercial wood filler. Once dry, sand flush and re-drill with the correct bit size. This provides a solid anchor for the hardware screw and preserves the cabinet’s integrity.
Is It Necessary To Drill Pilot Holes For Every Screw?
Yes, especially in hardwoods and MDF, drilling a pilot hole reduces the risk of splitting the wood and ensures the screw enters straight. For very soft woods, you might get away without a pilot hole, but it’s always best practice to pre-drill for consistent, professional results.
How Do I Handle Cabinets With Pre-existing, Mismatched Holes?
If replacing old hardware with new pulls of a different size, you have a few options:
- Use “adjustable” hardware that covers the old holes.
- Fill the old holes with wood filler and touch up with paint or stain.
- Drill new holes at the correct spacing, ensuring alignment and stability for the new hardware.
When in doubt, consult a professional carpenter for advice on best repair practices.
Upgrading cabinet hardware is one of the most satisfying and visible improvements you can make to your kitchen, bathroom, or furniture. By selecting the correct drill bit size, using the right tools, and following best practices, you ensure your new hardware looks great and functions flawlessly for years. Always test before you commit, and take your time with measurements, attention to these small details pays off every time. For further reading on wood drilling techniques and hardware standards, consult guides from organizations like the Woodworking Network or manufacturer documentation from companies such as Blum. With the right approach, your cabinet hardware installation will reflect the care and craftsmanship you put into your entire space.