A hole saw drill bit is the unsung hero of the workshop, bridging the gap between simple drilling and advanced carpentry or metalwork. With its circular blade and ability to carve perfect holes in wood, metal, plastic, and even masonry, the hole saw is indispensable for professionals and DIYers alike.
Yet, using one efficiently, and safely, requires more than just attaching it to a drill and pulling the trigger. Misuse can result in jagged holes, damaged materials, or even injury.
If you’ve ever struggled with splintered wood, overheated bits, or lopsided holes, you’re not alone. Understanding the nuances of the hole saw, from selecting the right type to mastering advanced techniques, can transform your projects. Whether you’re installing door hardware, running plumbing pipes, or wiring for recessed lighting, this guide will equip you with the knowledge, practical tips, and confidence to use a hole saw drill bit with professional-level results.
Key Takeaways
- Hole saws are versatile tools designed for cutting clean, round holes in a variety of materials, including wood, metal, plastic, and masonry.
- Choosing the correct hole saw type and size is critical for clean cuts and tool longevity.
- Proper setup, drilling technique, and safety precautions significantly affect the outcome and safety of your work.
- Lubrication, correct drill speeds, and pilot bits help prevent overheating, binding, and material damage.
- Regular maintenance of your hole saw extends its life and ensures consistent performance.
- Mastering advanced techniques enables you to tackle complex projects, such as angled or overlapping holes.

Credit: www.redboxtools.com
Understanding Hole Saw Drill Bits
A hole saw drill bit is a specialized cutting tool designed to create large, clean, circular holes in various materials. Unlike standard twist drill bits, which remove material by spiraling it out of a small hole, a hole saw cuts only the perimeter, leaving a solid core or “slug.
“
Anatomy Of A Hole Saw
A typical hole saw assembly comprises several parts:
- Saw Cup (Blade): Cylindrical with serrated edge to cut material.
- Arbor (Mandrel): Connects the saw cup to the drill and holds the pilot bit.
- Pilot Bit: Guides the hole saw, maintaining center alignment.
- Ejection Slots: Allow removal of the cut material core.
| Component | Function | Material |
|---|---|---|
| Saw Cup | Perimeter cutting | High-carbon steel, bi-metal, carbide-tipped |
| Arbor | Attaches to drill; holds pilot bit | Hardened steel |
| Pilot Bit | Centers the hole saw | Steel |
| Ejection Slots | Removes cut core | Openings in saw cup |
Types Of Hole Saws
Selecting the right hole saw depends on the material and application. Common types include:
- Bi-Metal: Combines flexibility and durability; ideal for wood and thin metals.
- Carbide Grit: For abrasive materials like tile and masonry.
- Diamond Grit: Used on ceramic, glass, and hard masonry.
- High-Speed Steel (HSS): For softer metals and plastics.
When To Use A Hole Saw
Hole saws excel in applications such as:
- Drilling for door locks and handles
- Creating pipe or conduit openings
- Installing recessed lighting
- Running cables and wiring
- Cutting vent holes
In my experience, choosing a bi-metal hole saw for general woodworking projects strikes the right balance between durability and cost.

Credit: www.youtube.com
Selecting The Right Hole Saw And Drill
Choosing the right combination of hole saw and drill makes the difference between a clean, effortless cut and a frustrating, time-consuming ordeal.
Matching Hole Saw To Material
- Wood: Bi-metal or high-carbon steel hole saws
- Metal: Bi-metal or carbide-tipped
- Masonry/Tile: Carbide or diamond grit
- Plastic: High-speed steel or bi-metal
Pro Tip: Always match the teeth per inch (TPI) to your material. Fewer, larger teeth work better for wood, while fine teeth excel in metal.
Sizing The Hole Saw
Measure the diameter of the opening needed and select a hole saw matching that size. For hardware installations, consult the manufacturer’s specs, door locksets, for example, typically require 2-1/8” hole saws.
Drill Compatibility
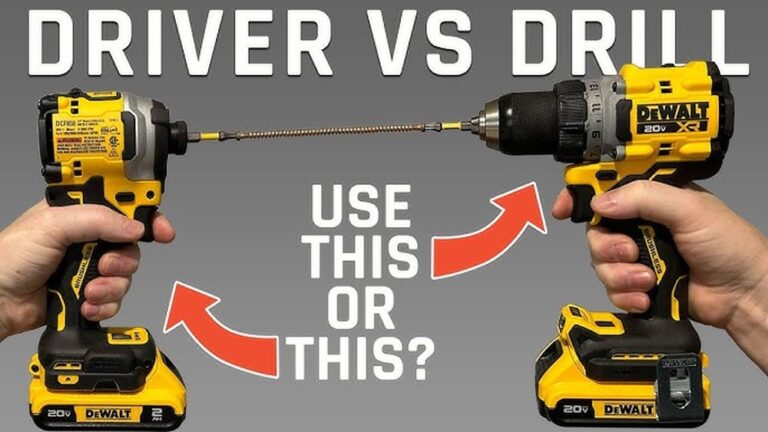
Not all drills are suitable for hole saws, especially larger sizes.
| Hole Saw Diameter | Recommended Drill Type | Speed Range (RPM) |
|---|---|---|
| < 1″ | Cordless, corded (3/8″ chuck) | 1000-1500 |
| 1″ – 2-1/2″ | Corded, heavy-duty cordless (1/2″ chuck) | 400-1000 |
| > 2-1/2″ | Low-speed, high-torque drill | 200-400 |
Warning: Using a lightweight drill with a large-diameter hole saw can cause the drill to stall or kick back.
Arbor And Pilot Bit Selection
Ensure your arbor matches both the drill’s chuck size and the hole saw’s mounting thread. Some hole saws use proprietary arbors; check compatibility before purchase.
Real-world Example: Choosing Tools For A Door Lock Installation
Suppose you need to install a new deadbolt. The manufacturer specifies a 2-1/8” hole for the lockset and a 1” hole for the latch. Using a bi-metal hole saw set and a corded 1/2″ drill ensures clean, precise holes without overtaxing your equipment.
Preparing For Drilling: Safety, Setup, And Marking
Preparation is critical for a successful and safe drilling operation. Skipping steps here can result in ruined workpieces or personal injury.
Safety First
Always wear safety glasses, ear protection, and gloves when working with power tools. For metal or masonry, a dust mask is advisable. Secure loose clothing and tie back long hair.
- Use a clamp or vise to secure your workpiece.
- Ensure the drill and hole saw are in good condition and properly assembled.
- Clear the work area of flammable materials and obstructions.
Marking The Hole
Accurate marking ensures correct placement and reduces the risk of misalignment.
- Measure and mark the center of the hole with a pencil or marker.
- Use an awl or center punch to make a small indentation at the mark, this helps guide the pilot bit and prevents wandering.
- For multiple holes, consider a template or jig for consistency.
Setting Up The Hole Saw
- Attach the arbor to the hole saw, ensuring it is tight and secure.
- Insert the pilot bit fully into the arbor and tighten the set screw.
- Attach the assembly to the drill, making sure the chuck is firmly tightened.
Pro Tip: Before starting, test the hole saw and drill combination on a scrap piece of material to ensure correct size and clean cutting.
Workpiece Support
- For doors, lay the door flat or brace it securely to prevent movement.
- For large sheets, use sawhorses and clamps.
- Place scrap wood behind the material to prevent splintering as the hole saw exits.

Credit: www.youtube.com
Drilling Techniques For Clean, Accurate Holes
A steady hand and proper technique make all the difference in achieving professional-quality holes.
Starting The Cut
- Position the pilot bit in the marked indentation.
- Hold the drill perpendicular to the work surface.
- Start the drill at low speed, applying gentle pressure until the pilot bit is fully engaged.
- Once the hole saw’s teeth contact the surface, increase speed slightly.
Warning: Do not force the hole saw, let the teeth do the cutting.
Controlling Speed And Pressure
- Use low to moderate speed for larger holes and harder materials.
- Apply steady, gentle pressure; excessive force can cause binding or overheating.
- For metal or masonry, periodically withdraw the saw to clear debris and allow cooling.
Reducing Tear-out And Splintering
To minimize splintering, especially in wood:
- Drill halfway through from one side, then finish from the opposite side, aligning the pilot bit with the existing hole.
- Use masking tape over the cut line to reduce chipping.
Lubrication And Cooling
For metal and masonry:
- Apply cutting oil or lubricant to the hole saw teeth before and during drilling.
- For tile and glass, use water as a coolant.
Pro Tip: Overheating blunts teeth and can permanently damage the hole saw. Stop periodically to let the tool cool.
Removing The Core
When the cut is complete, the core or “slug” may be stuck inside the saw cup. Use the ejection slots and a screwdriver to gently pry it out. For stubborn slugs, reverse the drill briefly to help loosen the material.
Example: Drilling Through A Laminate Countertop
When making a hole for a kitchen faucet, drilling from the finished side with a sharp hole saw and using masking tape over the cut prevents chipping. Supporting the underside with scrap wood ensures a clean exit.
Advanced Applications And Problem-solving
Mastering the hole saw opens the door to more complex projects and solutions for challenging scenarios.
Cutting Angled Holes
For tasks like installing pipes at an angle through studs, use a drill guide or template to maintain the correct angle. Start slowly to prevent the hole saw from wandering.
Making Overlapping Holes
When enlarging an existing hole, clamp a piece of scrap wood behind the material and drill through both at once. This stabilizes the pilot bit and prevents wandering.
Dealing With Hard Materials
For ceramic tile, glass, or masonry:
- Use a diamond grit hole saw and water as a lubricant.
- Begin with a template to help the hole saw start without slipping.
- Go slowly; patience is key.
Enlarging Existing Holes
Standard pilot bits can’t center in an existing hole. Use a plug or a custom jig to guide the hole saw, or switch to a hole saw with a built-in centering guide.
Example: Retrofitting Recessed Lighting
Retrofitting recessed lighting in a finished ceiling often means enlarging an existing hole. Using a plywood template screwed over the hole, with the correct size pilot hole, lets you guide the hole saw with precision and control.
Maintenance And Longevity Of Hole Saw Drill Bits
Regular maintenance extends the life of your hole saws and ensures top performance.
Cleaning After Use
- Remove debris and pitch from teeth with a wire brush.
- For sticky residues, use mineral spirits or a dedicated blade cleaner.
Inspecting For Wear
Check for:
- Dull teeth: Resharpen or replace as needed.
- Bent or cracked saw cups: Replace immediately for safety.
- Damaged arbors or pilot bits: Swap out before next use.
Proper Storage
Store hole saws in a dry location, ideally in a dedicated case or organizer. Keep sets together for easy access.
Sharpening And Replacement
Some hole saws, especially bi-metal and carbide-tipped models, can be resharpened with a small file. For most users, replacing worn-out saws is more practical due to the low cost.
Example: Maintaining A Bi-metal Hole Saw Set
A woodworker who regularly drills for electrical boxes found that regularly brushing debris from the teeth and oiling the arbors after each use doubled the lifespan of his hole saws.
Real-world Use Cases And Case Studies
Understanding how others use hole saw drill bits in real projects can inspire your own work and help you troubleshoot.
Electrical And Plumbing Installations
Electricians and plumbers frequently use hole saws to run cables or pipes through studs, joists, and walls. A bi-metal hole saw paired with a right-angle drill is the preferred setup for tight spaces.
Hvac Ductwork
HVAC professionals use large-diameter hole saws to cut vent openings in sheet metal and drywall. Using carbide-tipped saws, they achieve clean cuts with minimal burring.
Carpentry And Cabinetry
Cabinetmakers use hole saws for everything from installing grommets for wire management to creating decorative cutouts. Using jigs ensures repeatable, precise results.
Example: Diy Home Renovation
During a bathroom renovation, a homeowner used a carbide-tipped hole saw to install a new shower fixture through tile. By taping the area, starting slowly, and using water for cooling, the result was a flawless hole with no cracks or chips.
Comparison Of Hole Saw Types And Applications
To further clarify which hole saw to use for each material, consult the following data-driven comparison.
| Material | Recommended Hole Saw Type | Expected Lifespan (Avg. Uses) | Typical Cost Range |
|---|---|---|---|
| Wood | Bi-metal, HSS | 30-50 | $8 – $25 |
| Metal (mild steel) | Bi-metal, carbide-tipped | 20-40 | $15 – $40 |
| Masonry | Carbide grit, diamond grit | 15-25 | $20 – $60 |
| Tile/Glass | Diamond grit | 10-20 | $25 – $80 |
| Plastic | HSS, bi-metal | 40-60 | $8 – $25 |
For more detailed information on tool types and best practices, see Wikipedia’s entry on hole saws.
Safety Precautions And Common Mistakes
Even experienced users can fall into bad habits or overlook essential safety measures.
Essential Safety Tips
- Always use both hands on the drill to control torque and prevent kickback.
- Never wear loose clothing or jewelry while drilling.
- Disconnect the drill from power before changing hole saws or arbors.
Avoiding Common Mistakes
- Skipping pilot holes: Leads to wandering and off-center holes.
- Drilling too quickly: Causes overheating and dulls teeth.
- Ignoring material support: Results in splintered exits or cracked tiles.
- Forgetting lubrication: Increases friction and tool wear, especially in metal.
Kickback And How To Prevent It
Large hole saws can catch and twist the drill unexpectedly. Use a drill with a side handle for additional control, and always start at low speed.
Example: Avoiding Kickback In Metal Drilling
An apprentice plumber experienced severe kickback when using a cordless drill with a large hole saw on a steel stud. Switching to a heavier, low-speed drill with a side handle eliminated the problem.
For more comprehensive tool safety guidelines, review the OSHA Personal Protective Equipment Guide.
Frequently Asked Questions
What Is The Best Way To Prevent A Hole Saw From Overheating?
To minimize heat buildup, use a lower drill speed, apply appropriate lubricant (such as cutting oil for metal), and periodically withdraw the saw to clear debris. For especially tough materials like tile or masonry, use water as a coolant and work in short bursts to allow the tool to cool.
Can I Use A Hole Saw Without A Pilot Bit?
Yes, but it’s challenging. Without a pilot bit, the hole saw is prone to wandering, resulting in an imprecise hole. For enlarging existing holes or drilling where a pilot can’t be used, create a guide with a scrap of wood or use a specialized jig to keep the saw steady during the initial cut.
How Do I Choose The Correct Drill Speed For Different Materials?
Drill speed depends on both the diameter of the hole saw and the hardness of the material. As a general rule, use higher speeds for small-diameter saws and soft materials like wood, and lower speeds for larger saws or harder materials such as metal or masonry.
Consult the hole saw manufacturer’s guidelines for specific RPM recommendations.
Is It Possible To Sharpen A Hole Saw, Or Should I Just Replace It?
Some hole saws, particularly those with large, accessible teeth (like bi-metal types), can be sharpened using a small triangular file. However, for most users, replacing dull or damaged hole saws is more practical due to time and cost considerations. Carbide and diamond grit saws typically cannot be resharpened and should be replaced when worn out.
What Should I Do If The Core Gets Stuck Inside The Hole Saw?
If the cut core or “slug” remains lodged in the saw cup, use the ejection slots to pry it out with a screwdriver. If it’s stubborn, reverse the drill briefly to help dislodge the core. For materials like wood or plastic, tapping gently with a mallet can also help loosen the slug for removal.
Using a hole saw drill bit may seem straightforward, but mastering its nuances elevates the quality, efficiency, and safety of your projects. With the right preparation, careful tool selection, and proper technique, you can cut precise holes in almost any material, opening up a world of possibilities in woodworking, metalworking, plumbing, and beyond.
Whether you’re a professional tradesperson or a weekend DIY enthusiast, the right knowledge transforms the humble hole saw into one of the most powerful tools in your arsenal.