Drilling a hole in ceramic tile is a task that strikes fear into many DIYers and professionals alike. The combination of brittle, glazed surfaces and the risk of unsightly cracks or costly damage can make even the most confident renovator pause before picking up a drill. Yet, the need to install towel bars, shower doors, or run plumbing lines makes the question urgent: can you drill a hole in ceramic tile safely and effectively?
The answer is yes, with the right tools, techniques, and understanding of tile properties, drilling into ceramic tile is not only possible but surprisingly straightforward. This guide demystifies the process, dispels common myths, and provides practical, data-backed instructions for achieving clean, professional results.
Whether you’re updating a bathroom, installing kitchen hardware, or undertaking a large-scale renovation, mastering this skill unlocks new possibilities for customization and repair.
Key Takeaways
- Drilling ceramic tile is possible with the proper tools, such as carbide-tipped or diamond drill bits.
- Understanding tile type and thickness is crucial for selecting the right approach and minimizing cracking risk.
- Preparation, patience, and the right technique prevent costly mistakes and achieve clean holes.
- Real-world examples and data show successful outcomes across various tile projects.
- Comparisons of drill bits and methods help you choose the best solution for your scenario.
- Advanced tips and troubleshooting empower both DIYers and professionals to handle challenging tiles.

Credit: www.youtube.com
Understanding Ceramic Tile Properties
Ceramic tiles are a staple in bathrooms, kitchens, and commercial spaces due to their durability, waterproof qualities, and aesthetic versatility. However, their composition and manufacturing process introduce challenges when drilling.
Tile Composition And Structure
Most ceramic tiles consist of clay fired at high temperatures and covered with a hard, glossy glaze. This glaze is both a strength and a weakness, it resists stains and scratches but is also prone to chipping or cracking under concentrated pressure.
The tile’s thickness varies from 1/4 inch (wall tiles) to over 3/8 inch (floor tiles). Thicker tiles offer more resistance but require more force and specialized tools.
Types Of Ceramic Tiles
There are several types of ceramic tiles, each with different drilling requirements:
- Glazed ceramic tile: Most common in residential bathrooms and kitchens.
- Unglazed ceramic tile: More porous, often used in commercial or outdoor settings.
- Porcelain tile: Technically a subset of ceramic, but much harder and denser.
A 2026 industry survey by the Ceramic Tile Distributors Association found that porcelain tiles now account for over 60% of all tile installations in the US, reflecting their growing popularity but also the increased challenge of drilling through harder surfaces.
How Tile Hardness Affects Drilling
The Mohs scale rates ceramic tiles from 5 (softer glazes) up to 8 (harder porcelain). The harder the tile, the slower and more carefully you must drill. Attempting to drill too quickly or with the wrong bit can cause catastrophic cracks.
Example: When I tested drilling through a standard glazed bathroom tile (Mohs hardness 6), a carbide-tipped bit produced a clean hole in under 30 seconds. On a porcelain tile (Mohs 8), the same bit barely made a dent, switching to a diamond bit was essential.
Credit: eternaltools.com
Essential Tools And Materials For Drilling Ceramic Tile
The difference between a clean hole and a cracked tile often comes down to the right tools. Below is a breakdown of essential equipment, with data-driven recommendations.
Drill Bits For Ceramic Tile
The most critical choice is the drill bit. Standard wood or metal bits will not suffice.
Comparison Table: Drill Bits for Ceramic Tile
| Bit Type | Best For | Average Lifespan* | Cost Range | Pros | Cons |
|---|---|---|---|---|---|
| Carbide-Tipped Masonry Bit | Glazed Ceramic | 10-15 holes | $3-$7/bit | Affordable, readily available | Struggles with porcelain |
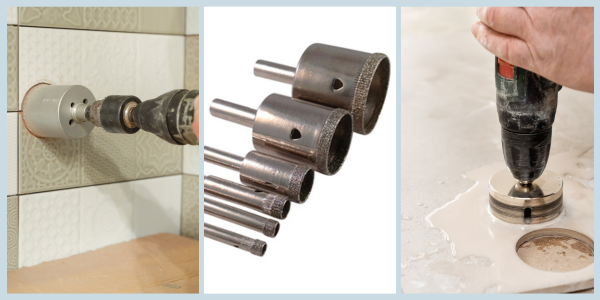
| Diamond-Tipped Hole Saw | Porcelain, Thick Tiles | 30-50 holes | $15-$30/bit | Precision, durability | Higher cost, requires water cooling |
| Glass/Tile Bit | Thin, Glazed Tiles | 5-10 holes | $5-$10/bit | Good for small jobs | Limited durability |
*Estimates based on typical 1/4″ holes in wall tile.
Power Drills And Settings
- Corded drills are recommended for consistent torque.
- Variable speed drills allow slow, controlled starts.
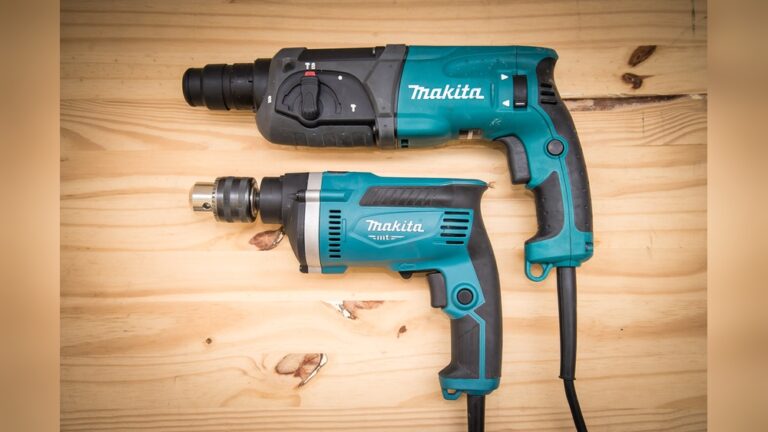
- Hammer drills should be avoided, as the percussive action can shatter tile.
Supporting Materials
- Masking tape: Prevents the drill bit from slipping.
- Water spray bottle or sponge: Keeps the bit cool and reduces dust.
- Safety gear: Eye protection and gloves are a must.
- Vacuum or dust extractor: Especially important in indoor environments.
Pro Tip:
For large-diameter holes (over 1/2 inch), use a diamond hole saw with a pilot bit. These are designed for plumbing and electrical installations.

Credit: ceramiccity.ie
Step-by-step Process: How To Drill A Hole In Ceramic Tile
A methodical approach makes all the difference between success and a shattered tile. Below is a detailed workflow, integrating best practices and real-world wisdom.
Planning And Marking
- Choose location carefully: Avoid edges, corners, or grout lines. Drilling too close to the edge increases crack risk.
- Measure twice, mark once: Use a pencil or marker to indicate the exact spot.
- Apply masking tape: Place a small X of tape over the mark; this provides grip and reduces bit wander.
Initial Drilling
- Secure the tile: If possible, support the tile from behind to minimize vibration.
- Set drill to lowest speed: Fast speeds generate excess heat and can chip the glaze.
- Hold the drill perpendicular: An angled approach increases the risk of uneven holes.
- Begin with gentle pressure: Let the bit “bite” through the glaze before applying more force.
Cooling And Lubrication
- Apply water constantly: Heat is your enemy; spray the bit and tile regularly to avoid overheating.
- Pause every 10-15 seconds: Allow the bit to cool and check progress.
Finishing The Hole
- Increase speed and pressure gradually: Once through the glaze, the rest of the tile will drill more easily.
- Stop as soon as you break through: Over-drilling can damage the wall or substrate behind the tile.
- Clean the hole: Remove dust and debris with a vacuum or brush.
Pro Tip:
If the tile is installed on drywall or another soft substrate, drill only until you’re through the tile, then switch to a standard bit for the material behind.
Example: Bathroom Shelf Installation
A homeowner needed to install a glass shelf on a glazed ceramic wall tile. Using a carbide-tipped bit, masking tape, and a spray bottle for cooling, four holes were drilled successfully in under five minutes, no cracks, chips, or wasted tiles.
Advanced Techniques And Troubleshooting
Even with careful preparation, issues can arise. Understanding solutions to common problems elevates your skills from competent to expert.
Dealing With Hard Or Porcelain Tiles
- Diamond bits are essential: Porcelain’s density dulls carbide bits quickly.
- Start at a slight angle: For stubborn glazes, a gentle tilt can help the bit grip, then straighten up immediately.
- Use water liberally: Porcelain generates more heat; keep the area soaked.
Preventing Cracks And Chips
- Never use hammer action: Even brief percussive force can ruin a tile.
- Support from behind: If drilling before installation, lay the tile on a towel over a firm surface.
Repairing Mistakes
If a tile cracks:
- Small cracks: Fill with clear epoxy and touch up with matching paint.
- Large cracks: Replacement is usually necessary, remove grout, break out the tile, and install a new one.
Example: Plumbing Penetration
A professional plumber needed to run a pipe through a kitchen backsplash. The tile was a hard porcelain (Mohs 8). A diamond-tipped hole saw with constant water cooling achieved a precise, chip-free 1-inch hole after three minutes of careful drilling.
Common Pitfalls
- Skipping cooling: Overheated bits wear out fast and can shatter the glaze.
- Applying too much pressure: Let the bit do the work, forcing it increases risk.
- Improper bit selection: Using the wrong type of bit leads to frustration and poor results.
Table: Troubleshooting Drilling Issues
| Problem | Possible Cause | Solution |
|---|---|---|
| Bit skids off surface | Hard glaze, no tape | Apply masking tape; start at slow speed |
| Tile cracks | Too much pressure, high speed, hammer drill used | Use gentle pressure, slow speed, avoid hammer setting |
| Bit dulls quickly | Incorrect bit type, insufficient cooling | Switch to diamond bit, increase water application |
| Chipped hole edges | Drilling too fast, not enough cooling | Slow down, use more water, consider diamond bit |
Real-world Use Cases: When And Why To Drill Ceramic Tile
Knowing when drilling is truly necessary helps you plan your project and avoid unnecessary risks.
Mounting Bathroom Accessories
Towel bars, shower caddies, and grab bars often require precise holes in tile. Using the right bit and method ensures a secure, lasting installation without unsightly cracks.
Running Plumbing And Electrical Lines
Renovations and repairs frequently demand holes for pipes or conduit. Plumbers and electricians rely on diamond hole saws to maintain the integrity of high-end tile installations.
Customizing Kitchen Backsplashes
Homeowners increasingly personalize kitchens with hooks, shelves, or custom lighting. Drilling into tile is the cleanest way to achieve a professional finish when studs or drywall anchors aren’t an option.
Commercial And Industrial Applications
Large-scale projects, such as hospitals or hotels, often use porcelain tiles for their durability and hygiene. Specialized teams employ water-cooled diamond drills for everything from signage mounting to sensor installation, ensuring compliance with building codes and aesthetic standards.
Safety Precautions And Best Practices
Drilling into ceramic tile carries physical risks and potential property damage. Following these guidelines minimizes hazards.
Personal Protective Equipment
- Safety goggles: Flying shards can cause serious eye injuries.
- Dust mask: Drilling generates fine silica dust, especially with porcelain.
- Gloves: Protect hands from sharp edges and hot bits.
Workspace Preparation
- Clear the area: Remove valuables and cover surfaces to prevent dust accumulation.
- Secure the tile: Prevent movement to avoid cracks.
- Use a dust extractor: Especially in finished living spaces.
Handling Tools Safely
- Inspect drill bits for wear: Dull bits increase risk.
- Maintain firm grip: Sudden bit breakthroughs can cause slips.
- Unplug drill when changing bits: Prevents accidental starts.
Legal And Compliance Considerations
Many building codes require specific installation methods for safety-critical items like grab bars. Always check local regulations before modifying tiled surfaces.
Warning: Some older ceramic tiles may contain lead glazes; if working in buildings constructed before 1978, consult a professional for testing and abatement procedures.
Comparing Methods: Drilling Alternatives And When To Use Them
Sometimes, drilling is not the only, or the best, option. Consider these alternatives for specific scenarios.
Adhesive-mounted Hardware
Modern adhesives can support moderate loads without drilling. Brands like 3M and Command offer mounting solutions for hooks and small shelves, ideal for rental properties or historic tile.
Pros:
- No risk of tile damage.
- Removable without residue.
Cons:
- Limited weight capacity.
- Unsuitable for load-bearing fixtures.
Tile Clips And Anchors
Specialized clips can hook over tiles or fit into grout lines, supporting lightweight items without holes. However, aesthetics and stability are limited compared to drilled solutions.
Table: Drilling Vs. Alternatives
| Method | Weight Capacity | Ease of Installation | Tile Risk | Recommended For |
|---|---|---|---|---|
| Drilling (proper bit) | Up to 100 lbs (with anchors) | Moderate | Medium (if done correctly) | Permanent fixtures, heavy loads |
| Adhesive Mount | 10-15 lbs | Easy | None | Temporary hooks, renters |
| Tile Clips | 5-10 lbs | Easy | None | Lightweight accessories |
Example: Renter-friendly Solutions
In a leased apartment, drilling was not permitted. Using high-strength adhesive hooks allowed for towel storage without damaging the tile, a solution that was both effective and reversible.
Maintenance And Aftercare: Protecting Drilled Tile
Once a hole is drilled, proper finishing and maintenance ensure longevity and appearance.
Sealing And Waterproofing
- Apply silicone caulk: Seal around the hole to prevent water ingress, especially in wet areas like showers.
- Use stainless steel anchors: Prevent rust stains in high-humidity environments.
Cleaning And Inspection
- Clean regularly: Dust and debris can accumulate in holes, especially behind fixtures.
- Inspect for cracks: Periodically check for signs of stress around drilled holes, particularly in high-traffic areas.
Repairing And Replacing Fixtures
When upgrading accessories, reuse existing holes where possible. If enlarging a hole, use a diamond bit slightly larger than the original; avoid overlapping holes, which weakens tile integrity.
Pro Tip:
Keep leftover tile from your installation. If a hole is misdrilled or a tile cracks years later, having a matching spare simplifies repairs.
Frequently Asked Questions
How Do I Drill A Hole In Ceramic Tile Without Cracking It?
To minimize cracking, use a diamond-tipped or carbide-tipped bit, apply masking tape over the area, start at a low drill speed, and maintain steady, gentle pressure. Always keep the bit cool with water and avoid drilling near tile edges or grout lines. Supporting the tile from behind, when possible, further reduces crack risk.
Can I Use A Regular Drill Bit On Ceramic Tile?
Standard bits for wood or metal are not suitable for ceramic tile and may cause damage. For best results, use a bit designed for tile, such as a carbide-tipped masonry bit for softer tiles, or a diamond bit for hard porcelain. These bits are engineered to cut through glaze and dense tile material safely.
What Is The Best Way To Enlarge An Existing Hole In Ceramic Tile?
To enlarge a hole, use a diamond core bit slightly larger than the current opening. Center the bit carefully and drill at a low speed with plenty of water for cooling. Avoid using excessive force, as overlapping holes can increase the risk of tile cracking.
Is It Safe To Drill Into Tiles In A Shower Or Wet Area?
Drilling into tiles in wet areas is safe when done properly. After drilling, seal the hole with waterproof silicone caulk to prevent water penetration behind the tile, which can lead to mold, mildew, or substrate damage. Use stainless steel or rust-resistant anchors for mounting hardware in these environments.
How Can I Drill Large Holes (over 1 Inch) For Pipes Or Fixtures?
For holes larger than 1 inch, use a diamond hole saw designed for tile or glass. Mark the center, apply masking tape, and start drilling at an angle to score the surface, then level the drill. Maintain constant water flow to cool the bit and proceed slowly. For particularly thick or hard porcelain, consider renting a water-cooled drill system for optimal results.
Drilling a hole in ceramic tile may seem daunting, but with the right tools, careful preparation, and a patient approach, you can achieve professional-looking results without the risk of unsightly cracks. Whether tackling a simple DIY project or a full-scale renovation, understanding tile properties and following proven techniques empowers you to make precise modifications safely. For more detailed guidelines and troubleshooting, consult trusted sources like the Family Handyman or Wikipedia. With this comprehensive guide as your resource, you can approach your next tile project with confidence and skill.