Drilling holes in rocks is a skill that bridges the worlds of geology, jewelry making, construction, and DIY crafts. Whether you’re an artist creating a pendant from river stone, a contractor anchoring bolts in granite, or a scientist extracting core samples, the ability to drill through stone is both practical and rewarding.
But rocks are not like wood or metal; their unpredictable grain, variable hardness, and tendency to fracture pose unique challenges. Mastering the process means understanding not only the right tools and techniques but also the properties of the rocks themselves.
If you’ve ever tried to force a standard drill bit into a piece of agate or struggled with a crumbling sandstone, you know that patience and preparation are essential. The good news: with the right approach, nearly anyone can drill clean, precise holes in rocks, without cracking, excessive wear, or wasted effort. This guide compiles expert advice, real-world examples, and hands-on experience to help you achieve professional results, no matter the rock or the application.
Key Takeaways
- Choosing the right drill bit is crucial; diamond-tipped bits work best for most rocks.
- Water cooling during drilling prevents overheating and extends tool life.
- Understanding rock type (hardness, structure) determines the best technique and tool.
- Proper safety gear and workspace setup reduce risks and improve accuracy.
- Patience and steady pressure are key to preventing cracks and ensuring clean holes.
Credit: www.youtube.com
Understanding Rock Types And Their Drilling Implications
Rocks are as diverse as the earth itself, and their physical properties directly impact drilling methods. Knowing what you’re working with is the foundation of success.
Common Rock Categories
- Igneous Rocks: Formed from solidified magma or lava (e.g., granite, basalt). These rocks are typically very hard and durable.
- Sedimentary Rocks: Composed of compressed particles or organic material (e.g., limestone, sandstone). Usually softer and more prone to crumbling.
- Metamorphic Rocks: Transformed by heat and pressure (e.g., marble, slate). Their hardness and structure vary.
The Mohs Hardness Scale is often used to gauge how difficult a rock will be to drill:
| Rock Type | Common Examples | Mohs Hardness | Drilling Difficulty |
|---|---|---|---|
| Igneous | Granite, Basalt | 6-7 | High |
| Sedimentary | Limestone, Sandstone | 3-4 | Low-Medium |
| Metamorphic | Marble, Slate | 3-6 | Medium |
How Rock Structure Affects Drilling
- Grain size: Fine-grained rocks are less likely to chip.
- Porosity: High-porosity rocks (like pumice) may crumble under pressure.
- Layering: Laminated rocks (like slate) can split along layers if drilled improperly.
Pro Tip: Always test-drill on a scrap piece of the same rock to assess hardness and tendency to fracture.
Example: Drilling In Granite Vs. Sandstone
When I tested drilling in both granite (hard, crystalline) and sandstone (softer, granular), the granite required more time, water cooling, and several bit changes. Sandstone drilled quickly but needed gentle pressure to avoid crumbling.
Essential Tools And Materials For Drilling Rocks
The right equipment can mean the difference between a clean hole and a ruined project. Here’s what you need for efficient and safe rock drilling.
Types Of Drills
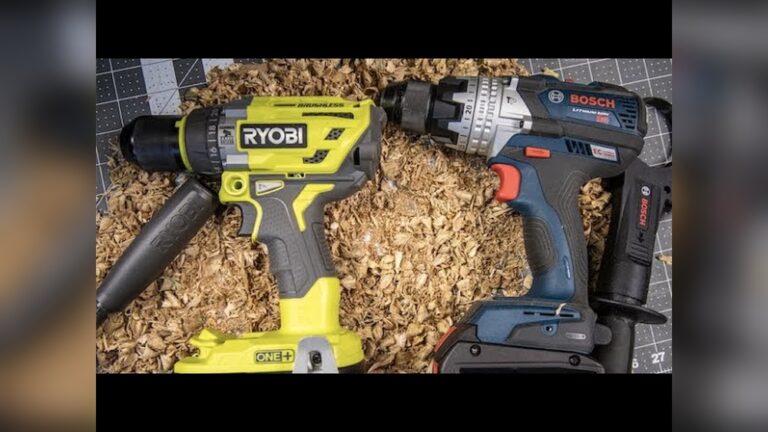
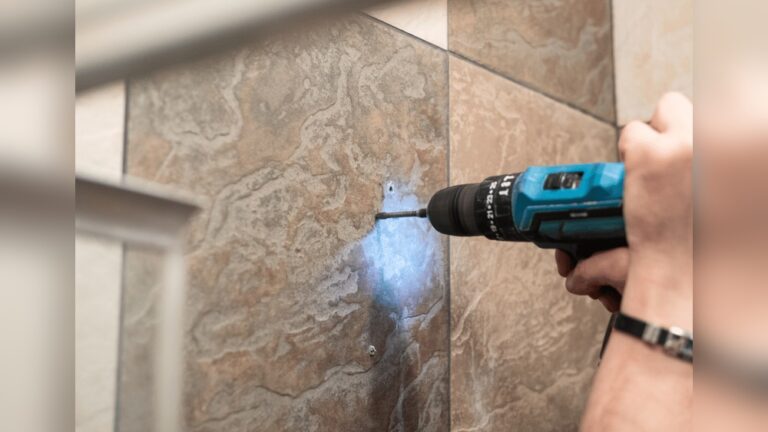
- Rotary Drill: Standard hand-held power drills work for most small-scale projects.
- Rotary Hammer Drill: For larger holes or harder rocks; uses a hammering action.
- Drill Press: Offers precise, vertical drilling for jewelry or lab work.
| Drill Type | Best For | Pros | Cons |
|---|---|---|---|
| Rotary Drill | Small rocks, crafts | Portable, affordable | Less power, less control |
| Hammer Drill | Large or hard rocks | More power, faster drilling | Heavier, more expensive |
| Drill Press | Precision work | Accurate, stable | Bulky, not portable |
Drill Bits
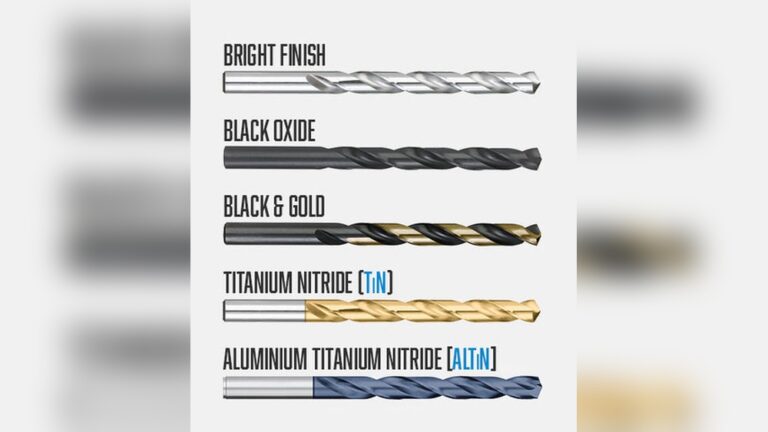
- Diamond-Tipped Bits: Essential for hard rocks; provide clean cuts and last longer.
- Carbide-Tipped Bits: Suitable for softer stones and masonry.
- Core Bits: For creating larger-diameter holes (remove a cylinder of material).
Pro Tip: Invest in high-quality diamond-tipped bits for frequent rock drilling, they pay for themselves in longevity and results.
Cooling And Lubrication
Drilling generates significant heat, which can fracture rocks and ruin drill bits. Use:
- Water drip system: Directs water to the bit during drilling.
- Dipping method: Submerge the rock partially in water while drilling.
Never drill dry for extended periods, overheating is the most common cause of tool and rock failure.
Safety Gear
- Safety goggles: Protects eyes from flying chips.
- Dust mask: Prevents inhalation of silica dust, which can be hazardous.
- Gloves: Safeguards hands from sharp edges and hot bits.
- Hearing protection: Especially for hammer drills or prolonged sessions.
Supporting Materials
- Clamp or vise: Secures the rock and prevents movement.
- Duct tape or clay: Helps start the hole and contain water.
- Marking tool: Pencil, chalk, or marker for precise placement.

Credit: www.youtube.com
Step-by-step Guide To Drilling Holes In Rocks
Following a methodical process ensures safety, efficiency, and the best results.
1. Selecting And Preparing The Rock
- Choose a rock free from visible cracks or inclusions.
- Wash and dry the rock to remove dust or debris.
- Mark the drilling spot with a visible dot or cross.
Pro Tip: For jewelry, ensure the hole will not be too close to the edge, which risks breakage.
2. Securing The Rock
- Use a vise with padding (rubber or cloth) to hold the rock firmly.
- For small or delicate stones, mold clay around the base to stabilize it.
- Double-check stability before starting, movement can cause bit slippage.
3. Setting Up Cooling
- If using a drill press, set up a tray to hold a shallow pool of water.
- For hand drills, create a clay dam around the drilling area and fill with water.
- Keep a spray bottle handy to re-wet as needed.
4. Choosing The Right Drill Bit And Speed
- Attach a diamond-tipped bit for most rocks.
- Set drill to a low-to-medium speed; high speed generates excess heat.
- Double-check that the bit is straight and secure.
5. Beginning The Drill
- Position the bit at a 90-degree angle to the rock’s surface.
- Start drilling with very light pressure to create a small indentation.
- Once started, increase pressure slightly but never force the bit.
Pro Tip: Let the drill and bit do the work; excessive force increases the risk of cracks.
6. Maintaining Cooling And Clearing Debris
- Ensure water is constantly cooling the bit.
- Every 15, 30 seconds, lift the bit slightly to allow water to flow in and debris to clear.
- If drilling dry (not recommended), pause frequently to cool the bit.
7. Completing The Hole
- As you approach the exit, reduce pressure to prevent blowout.
- For through-holes, consider flipping the rock and finishing from the opposite side for a cleaner exit.
- Rinse the rock and inspect the hole for rough edges; sand if necessary.
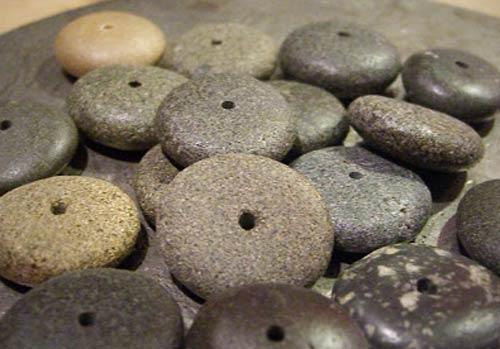
Example: When creating agate pendants, I always drill halfway from each side, the result is a perfectly aligned, chip-free hole.
Credit: jewelrytutorialhq.com
Advanced Techniques For Difficult Rocks And Large Holes
Some projects and rock types require more specialized methods. Here’s how to tackle the toughest jobs.
Core Drilling For Large Holes
- Use a diamond core bit for holes over 1/2 inch in diameter.
- Mark the center and use a guide template to prevent bit wandering.
- Maintain steady water flow for cooling and debris removal.
Drilling Ultra-hard Rocks
- For rocks above 7 on the Mohs scale (e.g., quartzite), use a rotary hammer with a diamond bit.
- Drill in short bursts, allowing time for both the rock and tool to cool.
- Replace bits as soon as cutting efficiency drops.
Preventing And Repairing Chips
- Place masking tape over the drilling spot to reduce surface chipping.
- Drill halfway from one side, then flip and finish from the other.
- For minor chips, sand with diamond files or wet/dry sandpaper.
Creating Tapered Or Countersunk Holes
- Start with a small pilot hole using a thin bit.
- Gradually increase bit size in steps for a clean, tapered opening.
- For countersinking, use a conical grinding bit at low speed.
Pro Tip: For especially valuable or fragile stones, practice the full process on a similar but less valuable rock.
Real-world Applications And Case Studies
Understanding how these techniques apply in the field brings the process to life and helps you avoid common pitfalls.
Jewelry Making With River Rocks
A jewelry artist wanted to create a necklace from a flat river pebble. Using a rotary tool with a 2mm diamond bit, she marked a spot near the center, clamped the stone, and drilled under water. The process took 3 minutes, with no cracks. She then sanded the hole with a diamond-coated wire for a professional finish.
Anchoring Bolts In Granite For Outdoor Structures
A landscaping contractor needed to anchor bolts into granite steps. Using a rotary hammer drill and 10mm diamond core bit, he marked the anchor points, started holes at low speed, and used a continuous water drip. Each hole took about 6 minutes. By letting the tool do the work and keeping the bit cool, he avoided bit burnout and chipping.
Scientific Core Sampling
Geology students often need to extract core samples for analysis. With a bench-mounted drill press and diamond core bits, they used a clay dam to contain water and maintain stability. By drilling halfway, flipping, and finishing from the other side, they obtained clean, undisturbed cores suitable for lab testing.
Troubleshooting And Common Mistakes
Even experienced DIYers and professionals encounter issues. Here’s how to recognize and solve the most frequent problems.
Bit Wears Out Too Quickly
- Most often caused by drilling too fast or without enough water.
- Use only diamond-tipped bits for hard rocks.
- Let the bit cool between drilling sessions.
Rock Cracks Or Shatters
- Excess pressure or high speed are typical culprits.
- For layered rocks, drill parallel to the grain if possible.
- Always start with a pilot hole, especially in brittle stones.
Hole Is Off-center Or Crooked
- Rock was not securely clamped.
- Bit wandered at the start, use a small starter bit or guide.
- Mark the hole carefully and check bit alignment before drilling.
Excessive Chipping At Entry/exit
- Tape or clay over drilling site can help.
- Finish the hole from the opposite side for best results.
- Slow down as you break through the final millimeters.
Debris Clogs The Hole
- Lift the bit frequently to clear rock dust.
- Use a water jet or compressed air to clean the hole.
Safety, Environmental, And Legal Considerations
Drilling rocks can introduce risks and, in some locations, legal restrictions. Being aware of these factors keeps you safe and compliant.
Personal Safety Practices
- Always wear safety goggles and a dust mask.
- Never hold small rocks in your hand while drilling.
- Keep loose hair and clothing away from moving parts.
Silica Dust Hazards
Many rocks contain silica, and inhaling the dust can cause lung disease (silicosis). Always drill wet and wear a mask rated for fine particulates.
Noise And Vibration
Repeated exposure to vibration can cause hand and arm fatigue. Use padded gloves and take frequent breaks.
Environmental Impact
- Collect and properly dispose of rock dust and slurry, never wash it into storm drains.
- Avoid drilling rocks from protected natural sites; check local regulations.
Legal Issues
- Collecting rocks from national parks or certain public lands is illegal without a permit.
- When drilling for commercial or scientific purposes, ensure you have the necessary permissions.
For a comprehensive overview of rock collecting laws, see the Rockhounding Wikipedia page.
Maintenance And Care Of Tools
Proper maintenance extends the life of your equipment and ensures consistent performance.
Cleaning Drill Bits
- After each session, rinse diamond bits in water to remove slurry.
- Use a soft brush to clear embedded debris from bit grooves.
- Allow bits to dry fully before storage.
Checking Drill Alignment And Wear
- Inspect drill chucks for tightness and alignment.
- Replace bits that show excessive wear or reduced cutting efficiency.
- Lubricate drill mechanisms as per manufacturer’s instructions.
Storing Equipment
- Store bits in a dry, labeled container away from corrosive materials.
- Keep power drills in cases to prevent dust and moisture ingress.
Record-keeping
- Track the number of holes drilled per bit to predict when replacements are needed.
- Note rock types and bit performance for future reference.
Pro Tip: A small investment in regular maintenance pays off in fewer tool failures and better hole quality.
Cost Analysis And Tool Comparison
Understanding the upfront and ongoing costs helps you budget for your rock-drilling projects.
| Tool/Material | Entry-Level Cost | Professional Cost | Expected Lifespan |
|---|---|---|---|
| Rotary Drill | $50, $100 | $200, $400 | 5, 10 years |
| Hammer Drill | $100, $200 | $400, $800 | 7, 12 years |
| Drill Press | $150, $300 | $600, $1500 | 10, 20 years |
| Diamond Bit (single) | $5, $15 | $30, $60 | 50, 200 holes |
- Diamond bits are the most significant consumable cost for frequent drilling.
- Professional tools offer longer lifespan and greater precision, but for hobbyists, entry-level tools suffice.
For a deeper review of tool comparisons, refer to the Family Handyman’s Hammer Drill Guide.
Frequently Asked Questions
What Is The Best Drill Bit For Most Types Of Rock?
For the majority of rocks, especially hard varieties like granite or agate, diamond-tipped drill bits offer the best balance of speed, cleanliness, and durability. They cut efficiently through dense mineral grains and are less likely to overheat or dull rapidly compared to carbide bits. For softer sedimentary rocks, carbide-tipped bits can suffice, but diamond is universally preferred for consistent, high-quality results.
How Can I Avoid Cracking Delicate Stones When Drilling?
To prevent cracks, secure the stone firmly in a padded clamp or clay mold, drill at a low speed, and use minimal pressure. Always keep the area wet to dissipate heat. For extra protection, place a piece of masking tape or clay over the spot where you’ll drill; this helps distribute the force and minimizes surface chipping.
For fragile stones, consider drilling halfway from each side to reduce breakage risk.
Is It Safe To Drill Rocks Indoors?
Drilling rocks indoors is safe if you follow key safety precautions: wear a dust mask, use water to suppress dust, and ensure good ventilation. Always contain water and debris to avoid mess and potential slip hazards. For high-volume projects, consider setting up in a garage or workshop with easy-to-clean surfaces. Never drill dry indoors, as silica dust can pose serious health risks.
Can I Use A Regular Wood Drill Bit For Rocks?
Standard wood or metal drill bits are generally ineffective and can be damaged by most rocks. They lack the hardness and abrasive resistance needed for minerals, leading to rapid dulling and possible breakage. For best results, invest in diamond-tipped or carbide-tipped bits specifically rated for masonry or stone.
How Do I Clean And Finish Holes After Drilling?
After drilling, rinse the hole thoroughly to remove slurry and grit. If the hole is rough, use a diamond-coated wire or round file to smooth the interior. Wet/dry sandpaper can be wrapped around a small dowel for further refinement. For jewelry or display pieces, a final polish with fine grit or a felt-tipped rotary tool will enhance appearance and remove any sharp edges.
Drilling holes in rocks may seem daunting, but with the right tools, techniques, and patience, anyone can achieve professional results. From jewelry artists to construction pros, mastering this skill opens a world of creative and practical possibilities. By understanding your materials, respecting safety protocols, and applying best practices, you’ll turn even the hardest stone into a canvas for your next project.